This guide covers everything needed to protect a Google Workspace tenant: creating the backup set, the one-off domain-wide delegation step in the Google Admin console, choosing destinations, what can and cannot be restored afterwards, and troubleshooting.
Contents
Creating the backup set
-
Log in to the backup software.
-
In the main interface, click Backup Sets.
-
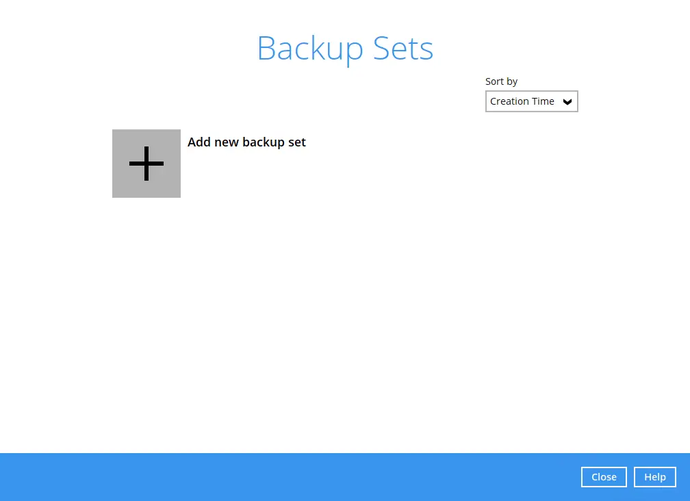
Click the + icon beside “Add new backup set”, or the Add button if other backup sets already exist.
-
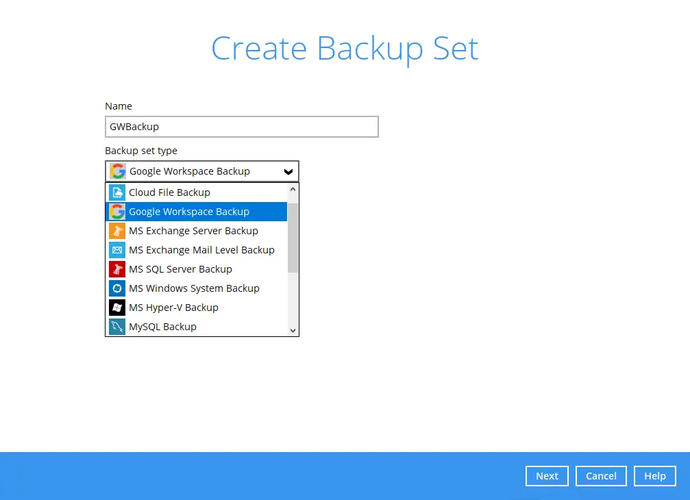
Enter a Name for your backup set and select Google Workspace as the backup set type.
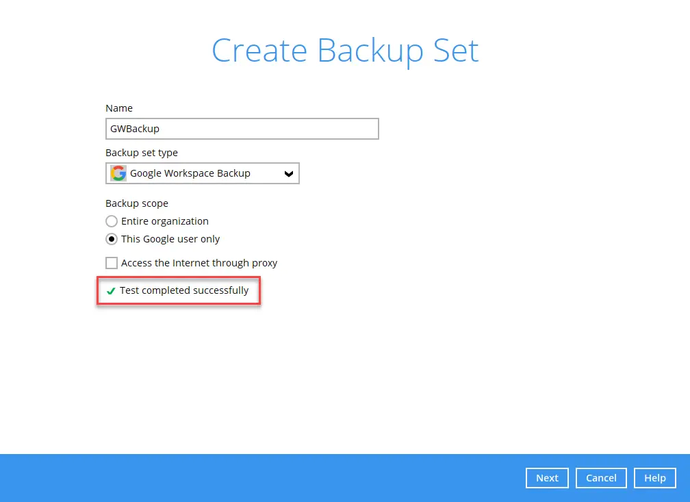
Select the Backup Scope — either Entire organisation or This Google user only. Tick Access the Internet through proxy if needed, then click Test.
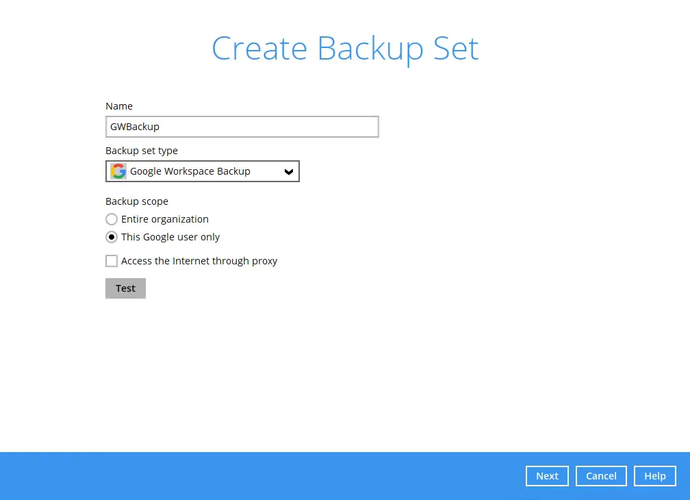
Note: the Entire organisation option only works if you have a Google Workspace admin account. If you select This Google user only, you need to enter the email address of the user you want to back up.
-
Click Authorise in the backup software to start the authentication process.
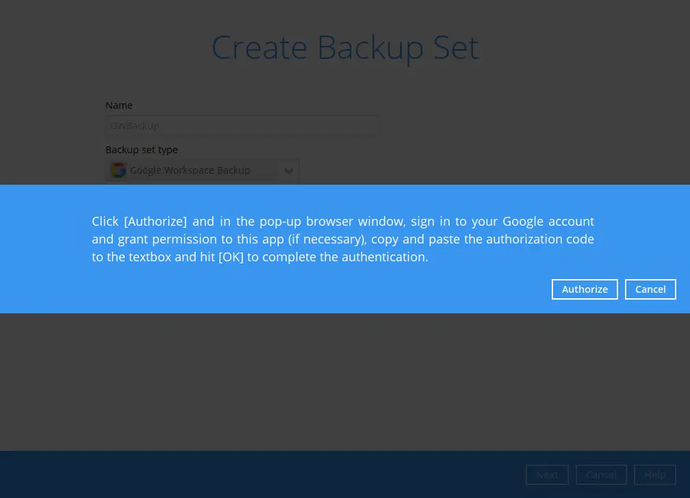
Sign in to your Google Workspace account.
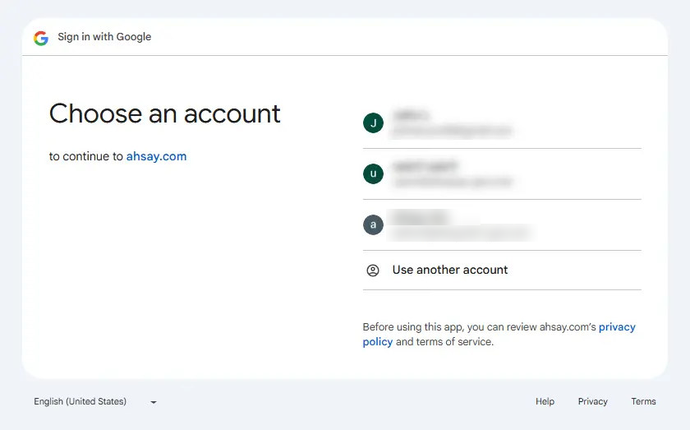
Note: if the accounts have already been signed in before, or other accounts are signed in on the machine, select the Google Workspace account you wish to back up. Otherwise click Use another account to sign in to the account you want to back up.
After signing in you are asked to allow the backup software to access your Google Workspace account. Click Continue.
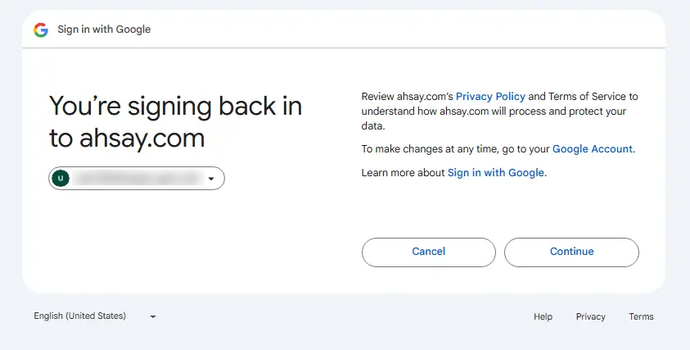
-
Copy the authorisation code.
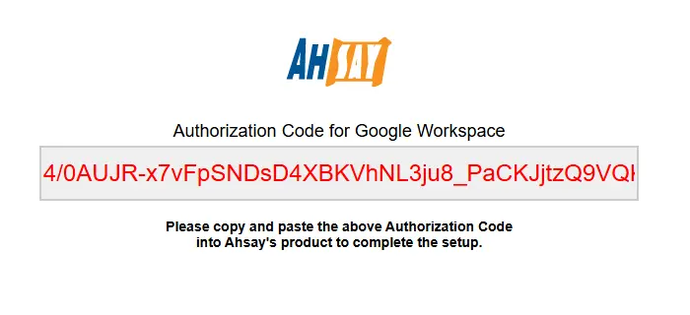
-
Go back to the backup software, paste the authorisation code and click OK.
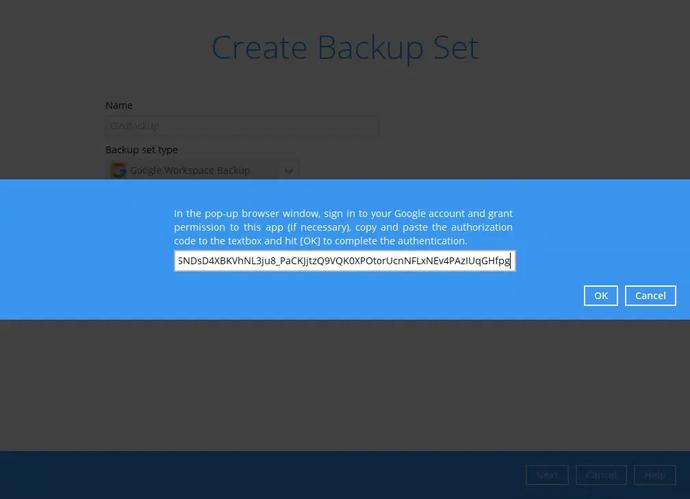
Important: if the backup scope selected is Entire organisation but the account used to sign in is a personal account, an error message is displayed.
-
“Test completed successfully” is displayed when the validation succeeds. Click Next to proceed.
Backup source
-
The Backup Source window is displayed. Select the Google Workspace services you want to back up, then click Next.
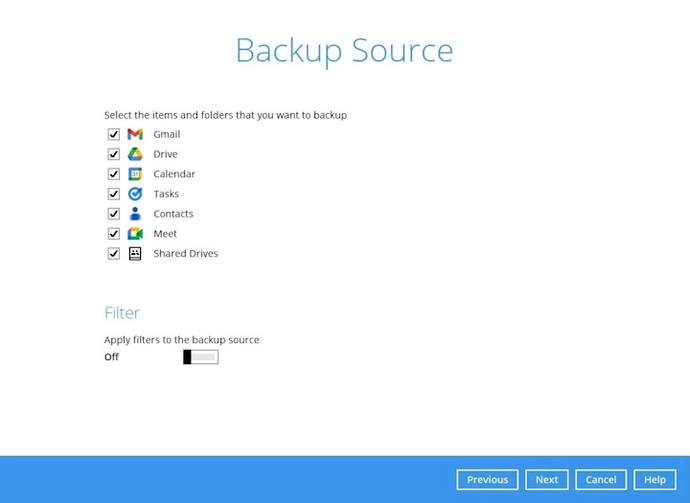
Note: if you signed in with an admin account you can also select Chats as a service to back up, and select specific Users and Shared Drives for the backup set.
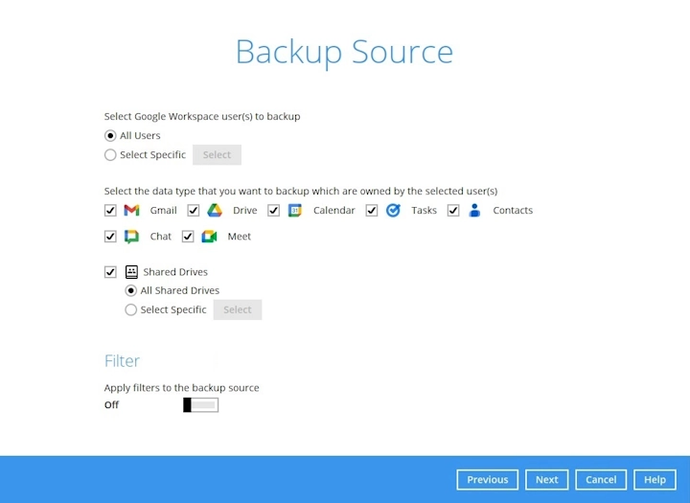
Note: from v10.1.2 a Filter is available in the backup source selection, where you can specify the files and folders to include or exclude during backup.
Google domain-wide delegation
Signing in as a Google Workspace administrator is not on its own enough to back up other users’ data. The backup software’s service account must also be authorised in your tenant, a one-off step called domain-wide delegation. If you skip it, authorisation appears to succeed and then fails later with unauthorized_client.
The Create Backup Set screen shows a Client ID and a list of OAuth scopes. Leave that window open and complete the following in a separate browser, then return to it.
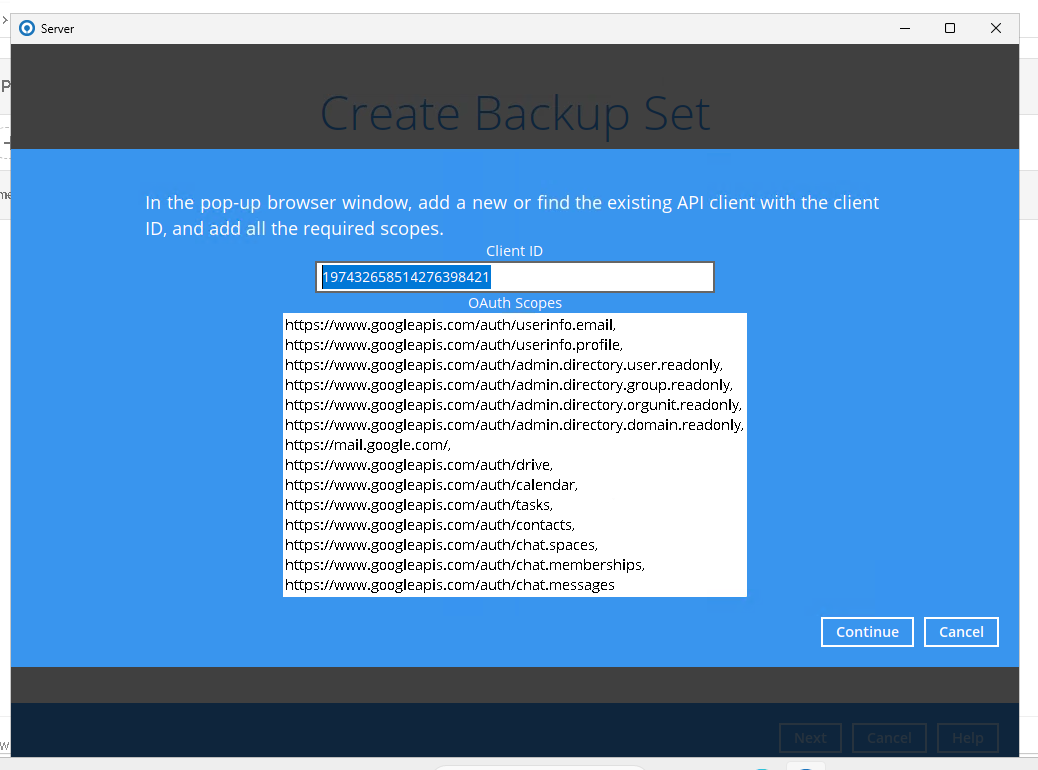
Open admin.google.com and sign in as a super admin. Use an incognito window if you are signed in to other Google accounts — applying delegation to the wrong tenant is the most common mistake here.
Go to Security > Access and data control > API controls, then click Manage Domain Wide Delegation at the bottom of the page.
Click Add new.
In the Client ID field, enter the Client ID shown on your own Create Backup Set screen. It is a 21-digit number, shown here only as an example as
197432658514276398421. Always use the value on your own screen. Copy rather than retype it — a single wrong digit fails silently and only surfaces later as an authorisation error.-
In the OAuth scopes field, paste the following. There is a comma at the end of every line except the last — 14 scopes, 13 commas.
https://www.googleapis.com/auth/userinfo.email,
https://www.googleapis.com/auth/userinfo.profile,
https://www.googleapis.com/auth/admin.directory.user.readonly,
https://www.googleapis.com/auth/admin.directory.group.readonly,
https://www.googleapis.com/auth/admin.directory.orgunit.readonly,
https://www.googleapis.com/auth/admin.directory.domain.readonly,
https://mail.google.com/,
https://www.googleapis.com/auth/drive,
https://www.googleapis.com/auth/calendar,
https://www.googleapis.com/auth/tasks,
https://www.googleapis.com/auth/contacts,
https://www.googleapis.com/auth/chat.spaces,
https://www.googleapis.com/auth/chat.memberships,
https://www.googleapis.com/auth/chat.messages
Keep the trailing slash on
https://mail.google.com/— without it Google treats it as a different scope and mail backup will fail. If the tenant does not use Google Chat, remove the last three scopes. Click Authorise in the Admin console, then re-open the entry and check all 14 scopes are listed (11 if you removed the Chat scopes). Google silently drops malformed entries, and a missing scope shows up later as a single failing service rather than an obvious error.
Wait for the grant to propagate, usually within ten minutes but occasionally longer, then continue with the backup set.
Note: delegation is granted per tenant. If you manage several Google Workspace customers, each one needs its own grant using the same Client ID.
Schedule
-
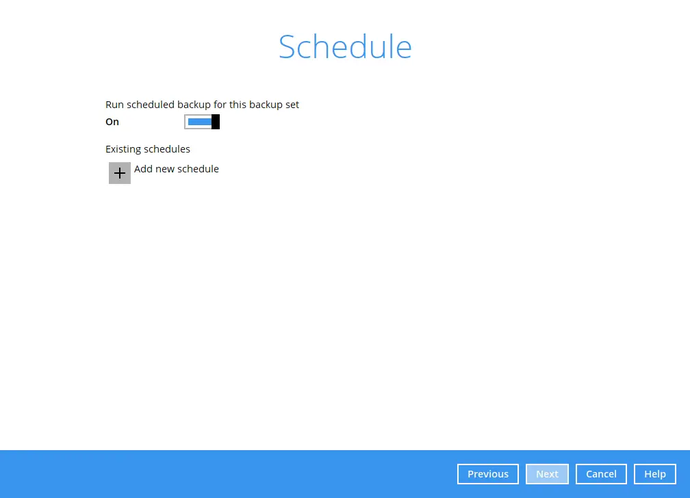
In the Schedule window, configure a backup schedule so backup jobs run automatically at your specified intervals. Slide the on/off button to turn the feature on, then click + Add new schedule.
Destinations
-
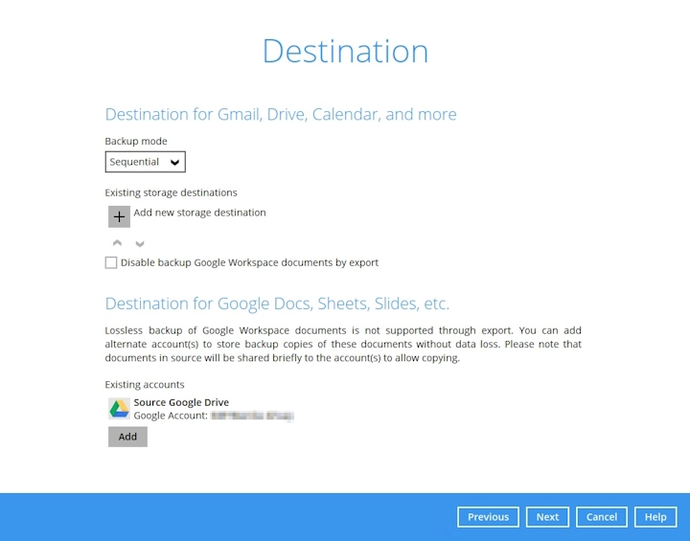
In the Destination window there are two kinds of backup destination you can configure:
- Backup Destination (predefined BOBcloud storage, local/network drives, cloud destinations and so on)
- Document Copy Destination (Google Drive)
These two destinations treat certain data backed up from Google Workspace differently in order to facilitate Lossless Backup, a constraint imposed by the Google Workspace API.
Regular storage destination
Basic Google services such as Gmail, Drive and Calendar can be backed up to any of the backup destinations the software supports, listed under Existing storage destinations.
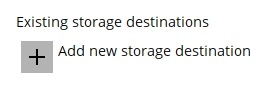
Click + Add new storage destination.
Select the storage destination.
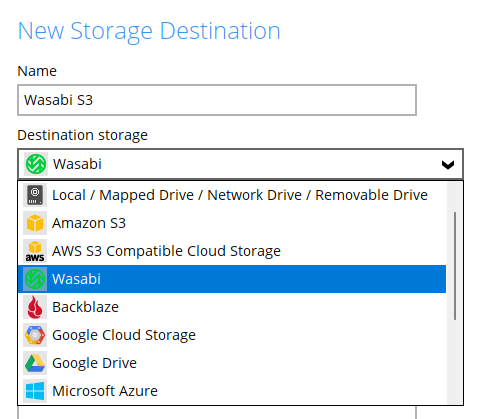
Complete the settings for the destination you chose, click Test to validate it, then click OK.
You can add multiple storage destinations. Backup data is uploaded to all the destinations you selected, in the order you added them. Use the up and down icons to change the order. Click Next to proceed.
Native Google documents — the export setting

Below the storage destination settings there is a tick-box for Disable backup Google Workspace documents by export. This is not a storage option and is worth pausing on: it decides whether native Google documents exist in your backup storage at all.
Native Google Workspace documents (Docs, Sheets, Slides) cannot be downloaded in their original form — Google’s API only allows them to be exported into another format such as .docx, .xlsx or .pptx. That conversion loses Google-specific features including comments, revision history and Apps Script.
By default the box is unticked, so those exported copies are backed up to your chosen storage destination.
Recommended: leave the box unticked. The exports are lossy, but they are the only copy of a native document that lives outside Google and can be restored without a working Google account.
Tick the box only if you are relying entirely on the Document Copy Destination described below, and accept that native documents will then be recoverable only while the Google tenant is available.
At restore time you choose which of the two copies to use — see the document copy destination in the restore guide.
Document Copy Destination
Because exporting native documents is lossy, the software can also make a copy of each one in a Google Drive account. The copy stays in its native format with nothing lost, because the duplication happens inside Google rather than through an export.
This destination covers native Google documents only — Docs, Sheets and Slides. Gmail, Calendar, Contacts, Tasks and ordinary Drive files such as PDFs and images are handled by the regular storage destination and are not affected by anything in this section.
To make each copy, the source document is shared briefly with the destination account and unshared once the copy completes. The share is temporary, but it does appear in the tenant’s Drive audit log, which is worth mentioning to any customer with a compliance team.
The Document Copy Destination is not a substitute for a regular storage destination. The copies live inside Google, so they are only recoverable while the Google tenant is available. Use both: the copy destination for full-fidelity recovery of an individual document, and a regular storage destination for a copy that survives losing the Google account entirely.
Choosing the destination account
By default the copies are written back to Source Google Drive — that is, each user’s copies are stored in that same user’s own Drive. This works, but it offers no protection against the most common failure of all: if the user is deleted, their document copies are deleted with them.
We recommend nominating a separate Google account instead. Copies are then held independently of the users being backed up, and survive routine offboarding.
Two practical points when sizing this:
- Copies consume the destination account’s Drive storage, not the source account’s. Check that no per-user or per-OU storage limit applies to the account you choose.
- A single Drive has a ceiling on the number of items it can hold. On a large tenant, funnelling every user’s native documents into one account can reach it. You can add more than one destination account if needed.
An account outside the tenant gives the most separation, since it also survives loss of the tenant itself — but the tenant’s external sharing policy must permit the temporary share, and the account needs enough storage to hold every user’s documents.
Under Existing accounts, click Add.
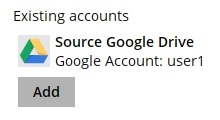
In the Document Copy Destination window, enter a Name for your Google Drive destination. The Destination is set to Google Drive by default and cannot be changed.
Click Test. A new window opens where you can choose a Google account to use its Google Drive as a backup destination, then click Continue. Copy the Authorisation Code and paste it into the new window in the backup software.
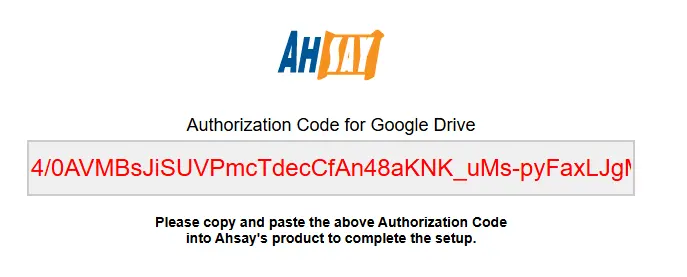
Once testing completes successfully, click OK.
Encryption
-
In the Encryption window, Encrypt Backup Data is enabled by default with an encryption key preset by the system, which provides the most secure protection. Click Next when you are done.
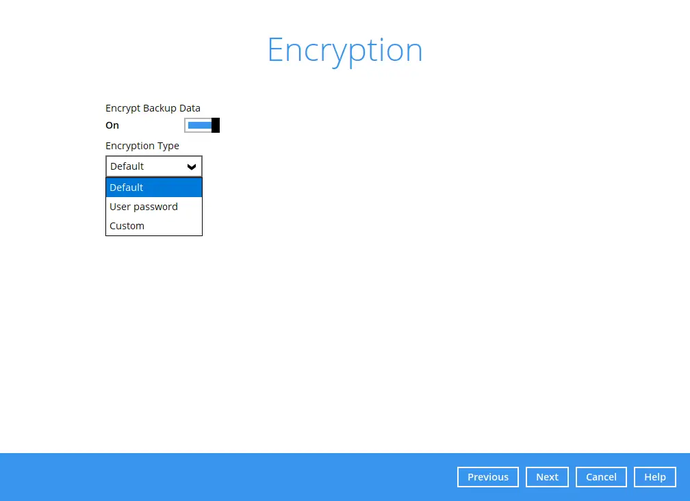
-
If you enabled the encryption key feature in the previous step, the following pop-up window is shown, whichever encryption type you selected.
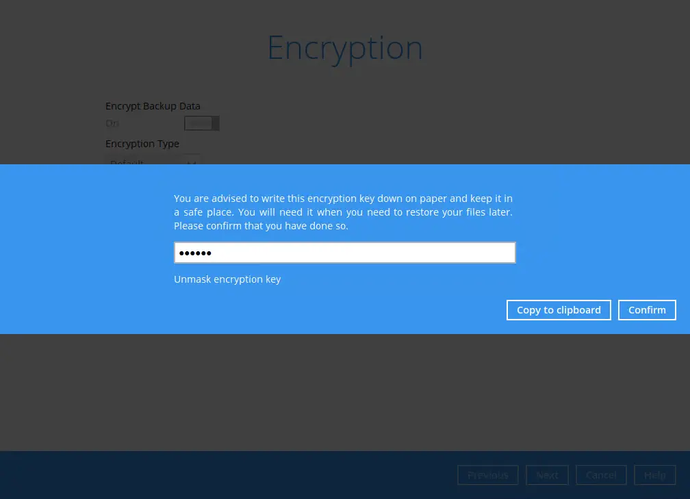
- Unmask encryption key — the key is masked by default; click to show it.
- Copy to clipboard — copies the encryption key so you can paste it somewhere of your choice.
- Confirm — exits the pop-up and proceeds to the next step.
Important: write the encryption key down and keep it somewhere safe. Without it your backup data cannot be restored, and we cannot recover it for you.
Finishing up
-
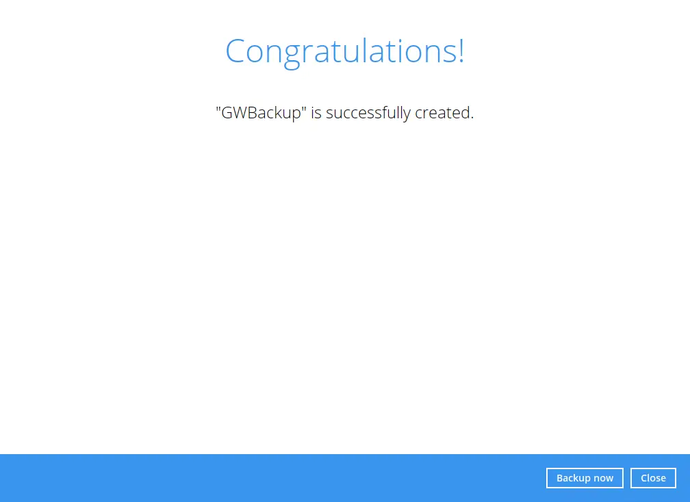
This screen is displayed when the new Google Workspace backup set is created successfully. Click Backup now to back up your data, or Close to return to the main screen.
-
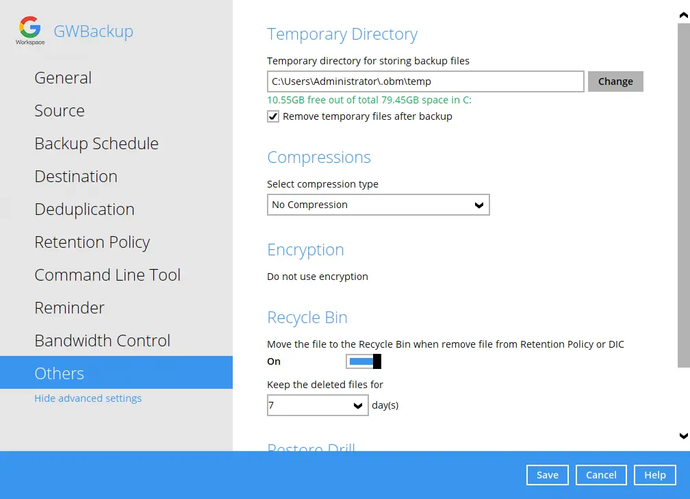
We strongly recommend changing the Temporary Directory to a location with sufficient free disk space other than drive C. Go to Others > Temporary Directory and click Change to browse to another location.
-
Optional: select your preferred compression type. By default the compression is Fast with optimisation for local. Go to Others > Compressions, then choose from No Compression, Normal, Fast (compressed size larger than normal) or Fast with optimisation for local.
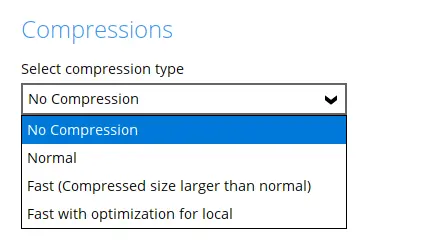
Click Save to apply the changes.
What can be restored
For the restore walkthrough itself, see Google Workspace Restore. This section covers what you get back.
Most Google Workspace data restores exactly as it was backed up. Native Google documents are the exception, for the reason described above: Google’s API has no way to export them without converting them. The table below sets out what to expect, so that recovery expectations are agreed before they are tested.
| Data | Restores as backed up? | Notes |
|---|---|---|
| Gmail | Yes | Messages, labels, read state and attachments. |
| Calendar | Yes | Events, recurrence and attendees. |
| Contacts and Tasks | Yes | — |
| Drive — ordinary files | Yes | PDFs, images, and Office files already stored as such are byte-identical. |
| Drive — native Docs, Sheets, Slides | Partly | Content restores. Comments, revision history, Apps Script and some formatting are lost. Full fidelity is only available from the Document Copy Destination, and only while the Google tenant exists. |
| Sharing permissions | No | Restored files are private and owned by the account performing the restore. Re-sharing is manual. |
| Google Forms responses | No | Google provides no way to write responses back. Treat Forms responses as unprotected. |
| Document links and embeds | No | Google assigns a new file ID on restore, so existing links to the old document will not resolve. |
Restoring after a user account is deleted
Google keeps a deleted user recoverable for 20 days under Directory > Users > Deleted users in the Admin console. Within that window, undeleting the user is faster than restoring and should be the first thing you try.
After 20 days the account is gone from Google. Because data cannot be restored into an account that does not exist, you will need to recreate the user (using the same address if mail threading matters), which requires a licence seat, and then restore into it. You can also restore to a different existing account if the customer only needs the data to be readable.
Restoring after the whole tenant is lost
If the Google Workspace tenant itself is deleted or terminated, every Document Copy Destination inside it is lost with it, whichever account was used. Only the data held in your regular storage destination survives — which is why we recommend leaving Disable backup Google Workspace documents by export unticked.
Recovery in this situation is a rebuild rather than a restore: a new tenant, the domain re-verified, MX records repointed, users recreated and licensed, domain-wide delegation set up again, and then the restore itself. Expect this to take days rather than hours, with most of that time spent on Google provisioning and DNS propagation rather than on the restore.
Tip: the step that most often causes delay here is not the backup at all — it is finding out who holds the domain registrar credentials. Record them alongside the backup configuration while everything is working.
Troubleshooting
| Symptom | Cause and fix |
|---|---|
unauthorized_client | Delegation has not propagated yet. It usually takes under ten minutes but can occasionally take considerably longer, so wait and try again. If it persists, check the Client ID matches the one on your Create Backup Set screen exactly. |
| An error appears when testing with Entire organisation selected | The account signed in is not a Google Workspace administrator. Either sign in as an admin, or change the scope to This Google user only. |
| Scopes missing after saving in the Admin console | Google drops malformed entries without warning. Re-open the delegation entry and confirm all 14 scopes are present (11 if you removed the Chat scopes). |
| The wrong domain is shown in the Admin console | You are working in the wrong tenant. Sign out and use an incognito window. |
| Chat backup fails although delegation succeeded | The Google Chat API is not available on this tenant, or Chat is disabled. If Chat is not in use, remove the three chat.* scopes. |
| Backups fail with insufficient disk space | The temporary directory is still on drive C. See the final step above. |
For restoring from one of these backup sets, see Google Workspace Restore.
If you need a hand with any of the above, contact us at support@bobcloud.net.