This guide shows how to create an MS Windows System or MS Windows System State backup set in the backup software, covering the temporary storage location, backup source, schedule, destinations, encryption and the recommended post-setup settings.
Which of the two you need
The two backup set types protect very different things and are not interchangeable.
| MS Windows System | MS Windows System State | |
|---|---|---|
| What it captures | A full image of the selected volumes, including the operating system, applications and data | Operating system configuration only — registry, Active Directory, certificate services, COM+ and boot files |
| Recovers a dead machine? | Yes, provided all critical volumes are included | No — it needs a working Windows installation to restore into |
| Typical size | As large as the volumes being imaged | Comparatively small |
| Typical use | Bare-metal recovery of a physical or virtual server | Rolling back a domain controller or a broken configuration change |
If in doubt, choose MS Windows System. System State alone will not bring a failed server back. It is worth running both on a domain controller: the system image for the machine, and system state for quicker Active Directory recovery.
Temporary storage — the most common cause of failure
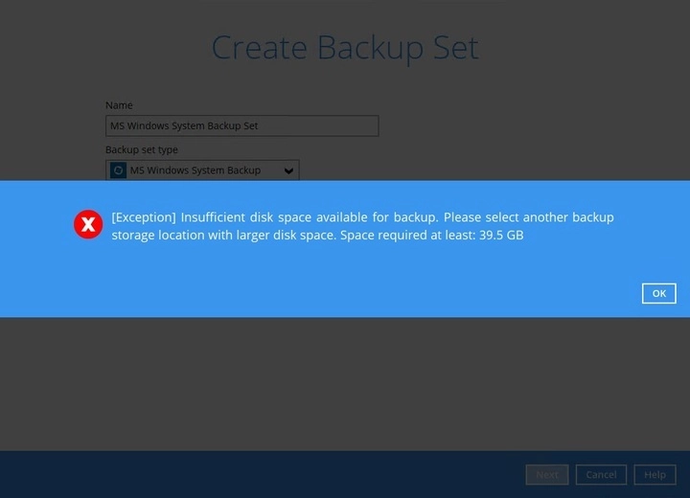
Before uploading anything, the software builds the complete system image in the temporary storage location you set in step 4. Only then is it compressed and sent to the backup destination. That location therefore needs free space of roughly the size of the data being imaged, and it needs it every time the backup runs.
Choosing a location without enough room is the single most common reason these backup sets fail. Before you start, check that:
- the location is not a volume that is itself being backed up — an image cannot be written into the volume it is imaging
- there is free space of at least the used size of the volumes being backed up
- the space stays available, rather than being consumed by other jobs between runs
- if a network path is used, the client can reach it reliably and has write access to it
-
Log in to the backup software.
-
In the main interface, click Backup Sets.
-
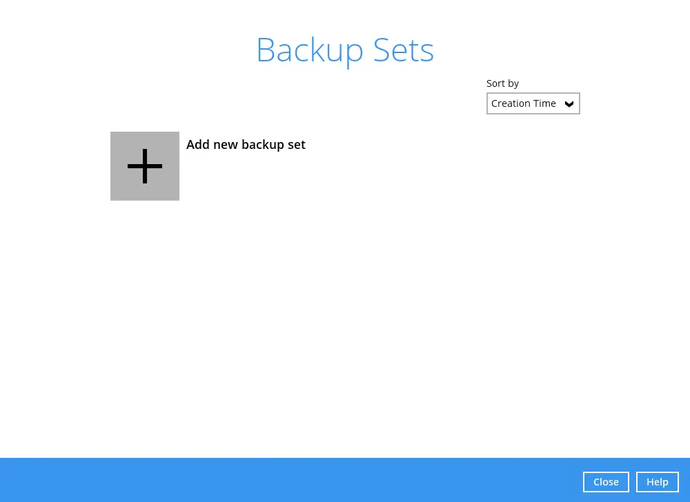
Create a backup set by clicking the + icon before “Add new backup set”.
-
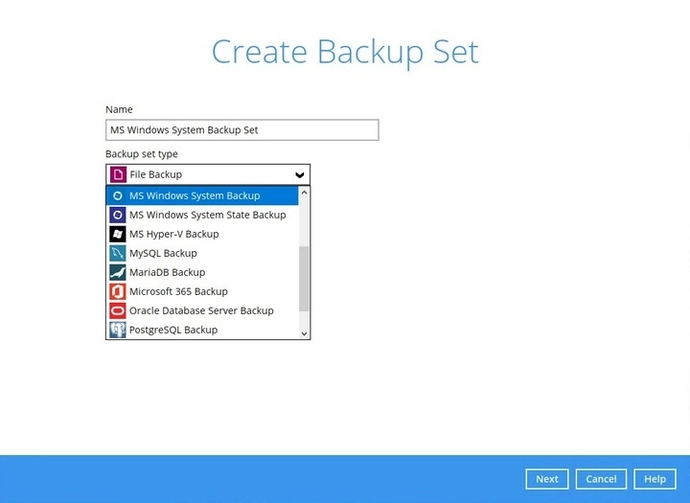
Select MS Windows System Backup or MS Windows System State Backup as the backup set type, and enter a Name for your backup set.
Select the location where the system image or system state image is stored before the backup data is generated. Either pick a local volume from the drop-down:
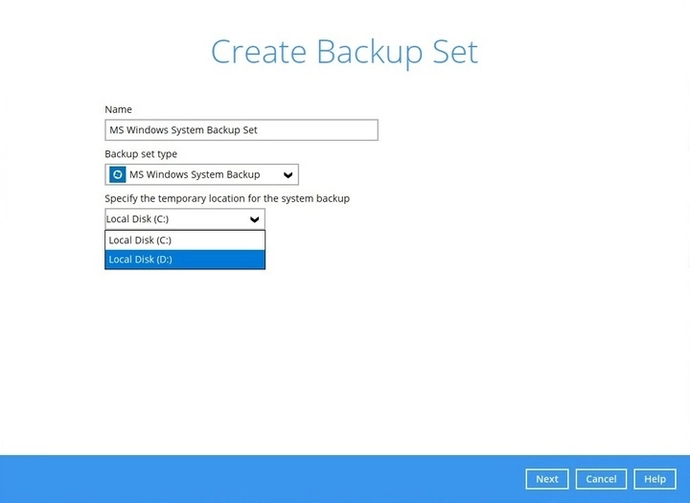
Or enter the UNC path to a network volume the client computer can reach:
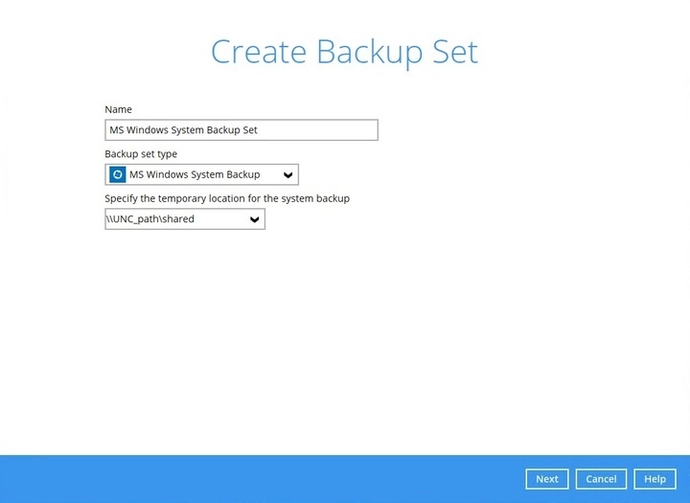
Note: the temporary storage location must be a local volume or a UNC path to a network volume the client can reach. It cannot be a mapped drive letter, and it cannot be a volume included in the backup source. See Temporary storage above for space requirements.
Click Next to proceed.
For an MS Windows System backup, this alert appears if the disk you selected has insufficient space:
For an MS Windows System State backup, this message appears if the storage location is set to a critical volume such as the system volume:
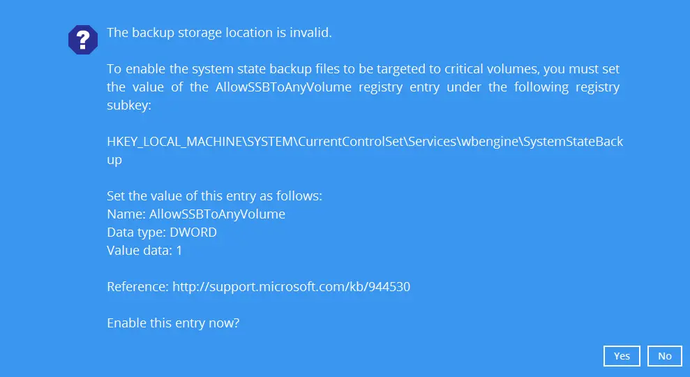
Click Yes to let the software enable the registry entry, or click No and change the storage location to somewhere else.
Note: on Windows Server 2008 the temporary storage location cannot be set to a network path.
-
In the Backup Source menu, select the volumes you want to back up.
Tick Include all critical volumes to select all critical volumes automatically. This ensures the backup image can be used for full-system or bare-metal recovery.
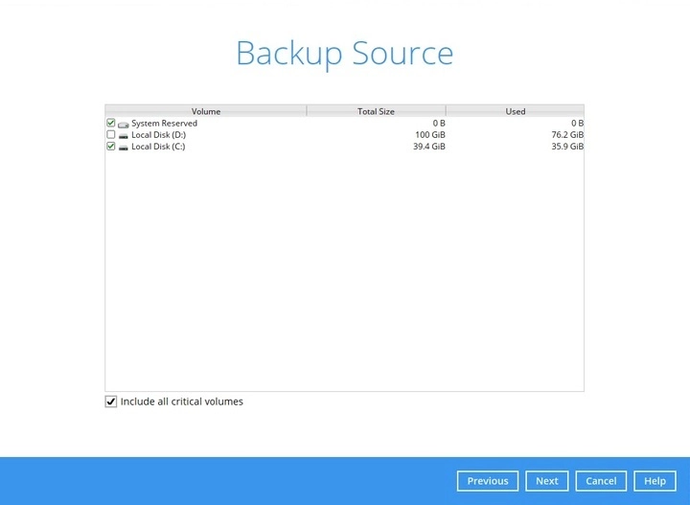
Note: the screen above is for MS Windows System Backup only.
Click Next to proceed.
-
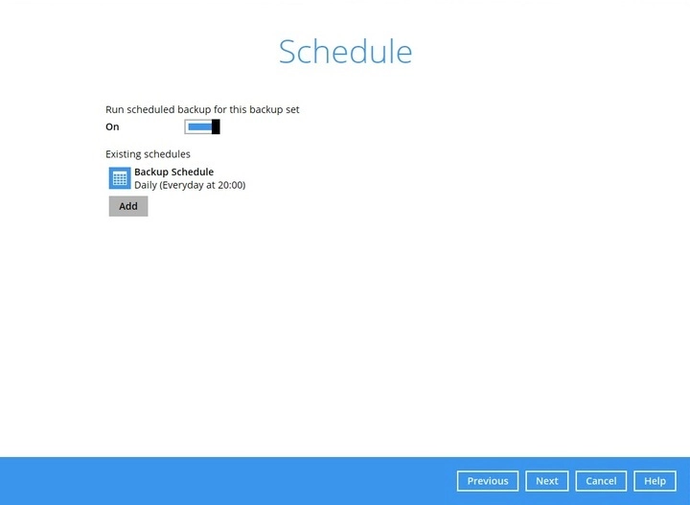
In the Schedule menu, configure a backup schedule so backup jobs run automatically at your specified intervals. Click Add to add a new schedule, then click Next.
-
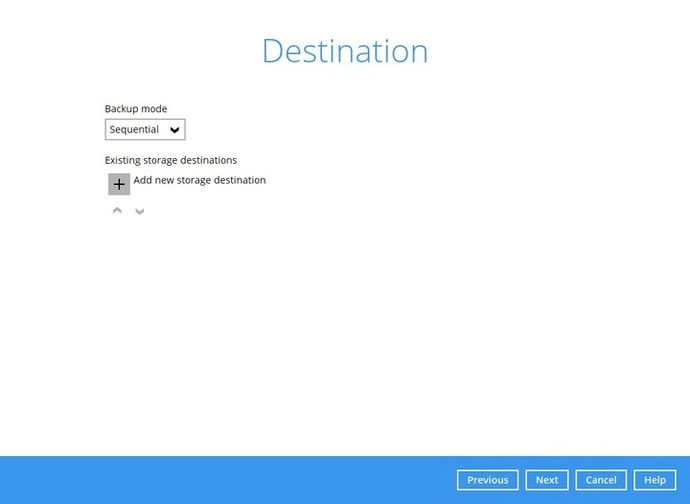
In the Destination menu, select a backup destination for the backup data. Click the + icon before “Add new storage destination / destination pool”.
-
Select the Destination storage.
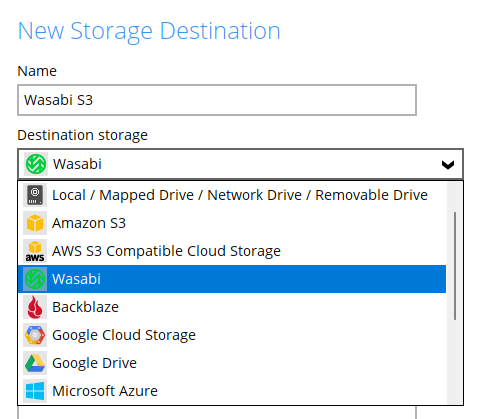
Note: multiple backup destinations can be configured for a single backup set. Backup data is uploaded to all of them, in the order you added them.
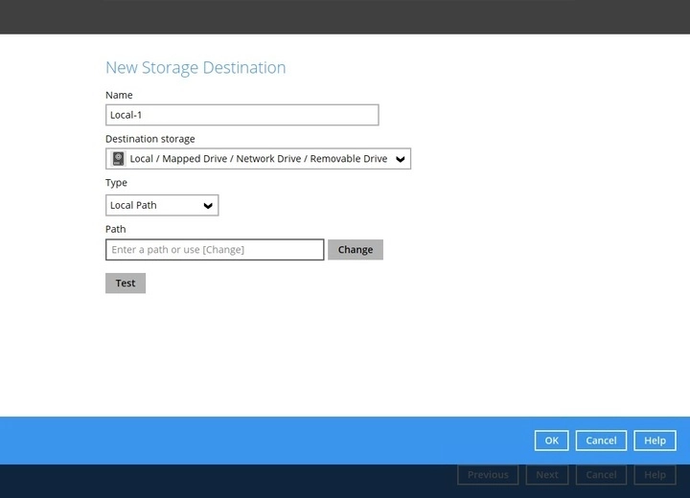
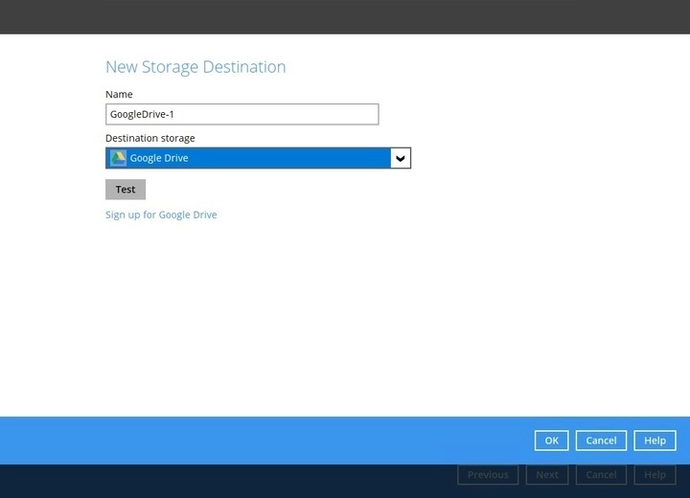
You can choose destinations such as predefined BOBcloud storage, Local / Mapped Drive / Network Drive / Removable Drive, cloud storage or FTP. Click OK when you are done with the settings.
- If you chose Local / Mapped Drive / Network Drive / Removable Drive, click Change to browse to a directory path where the backup data will be stored, then click Test to validate the path. “Test completed successfully” is shown when validation is done.
- If you chose cloud storage, click Test to log in to the corresponding cloud storage service.
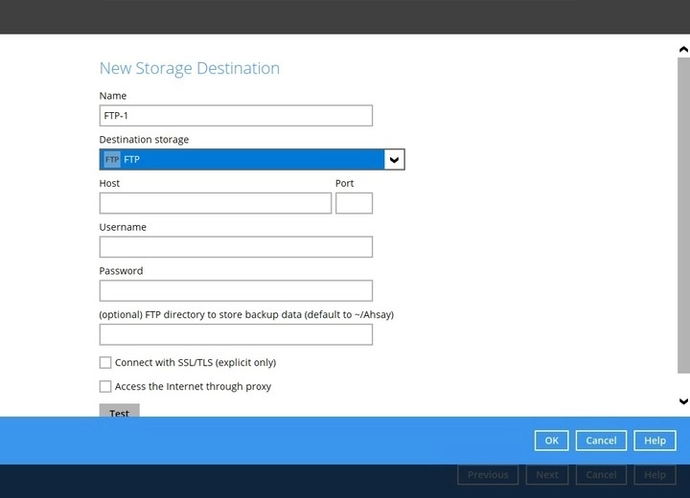
- If you chose FTP, enter the Host, Username and Password details.
Click Next when you are done with the selection.
-
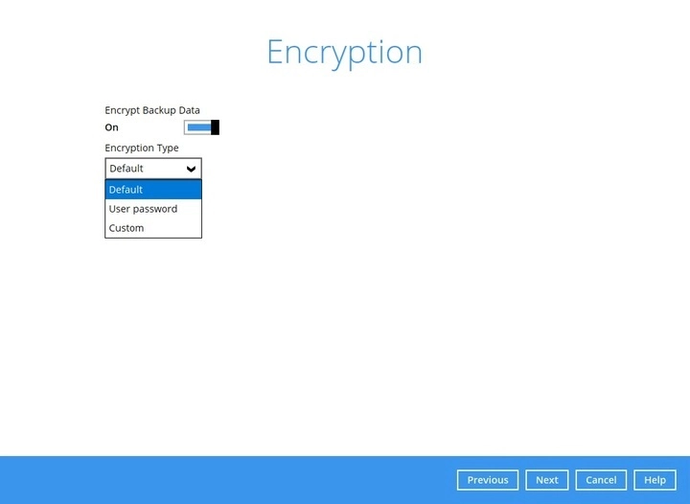
In the Encryption window, Encrypt Backup Data is enabled by default with an encryption key preset by the system, which provides the most secure protection. Click Next when you are done.
-
If you enabled the encryption key feature in the previous step, the following pop-up window is shown, whichever encryption type you selected.
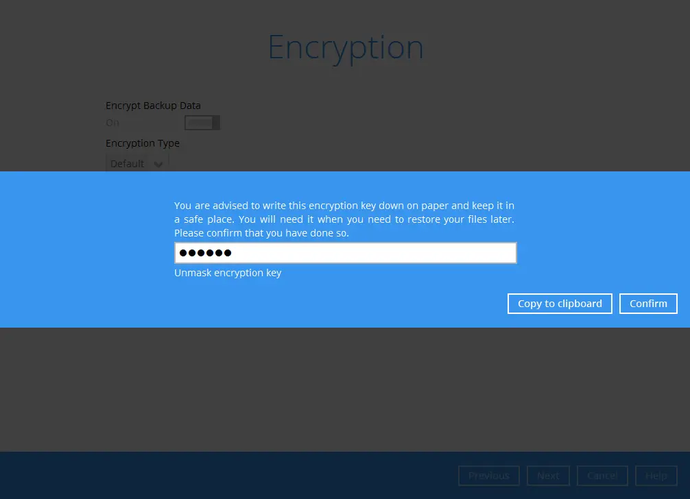
- Unmask encryption key — the key is masked by default; click to show it.
- Copy to clipboard — copies the encryption key so you can paste it somewhere of your choice.
- Confirm — exits the pop-up and proceeds to the next step.

Important: write the encryption key down and keep it somewhere safe. Without it your backup data cannot be restored, and we cannot recover it for you.
Click Next to create the backup set.
-
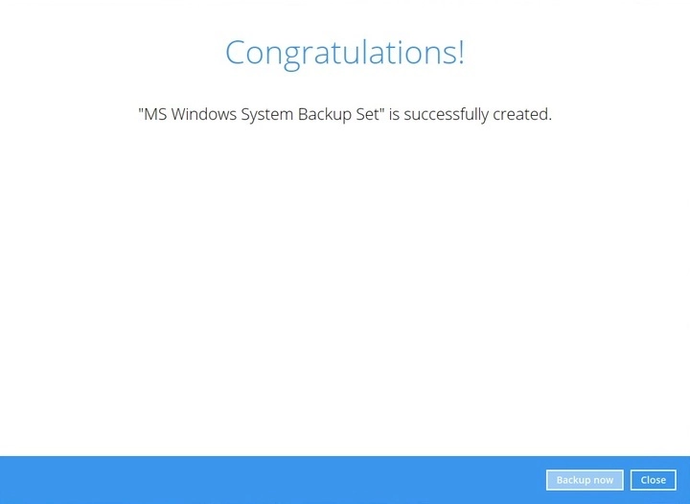
This screen is displayed when the new backup set is created successfully.
-
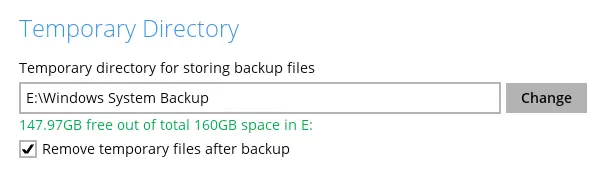
We strongly recommend setting the temporary directory to a location other than drive C: — drive E:, for example. Go to Backup Sets > Others > Temporary Directory and click Change to browse to another location.
-
Optional: select your preferred compression type. By default this is Fast with optimisation for local. Go to Others > Compressions, then choose from No Compression, Normal, Fast (compressed size larger than normal) or Fast with optimisation for local.
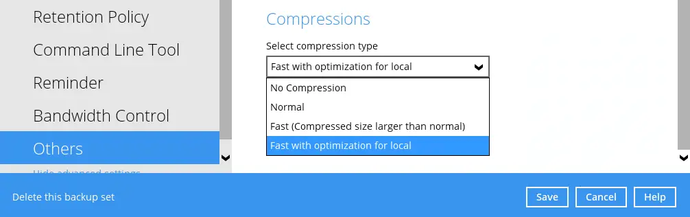
Click Save to apply the changes.
What a restore requires
A system image is only useful if the machine you restore it to will accept it. These constraints are set by Windows, not by the backup software, and are worth checking before you rely on the backup rather than during a recovery.
| Requirement | Detail |
|---|---|
| All critical volumes | A bare-metal restore only works if Include all critical volumes was ticked when the set was created. Backing up the data volume alone will not recover the machine. |
| Matching Windows version and edition | System State restores into an existing Windows installation and expects the same version and edition. Restoring across versions is not supported. |
| Firmware type | The target must use the same firmware mode as the source — UEFI to UEFI, or BIOS to BIOS. A UEFI image will not boot on a BIOS target. |
| Disk sizing | Target disks must be at least as large as the originals. Restoring to a smaller disk will fail even if the used space would fit. |
| Dissimilar hardware | Restoring to different hardware often needs the correct storage controller drivers to be injected, and may still fail to boot. Restoring to a virtual machine is usually more predictable than to unlike physical hardware. |
| Domain controllers | Restoring a domain controller has its own procedure involving Directory Services Restore Mode. Do not treat it as an ordinary system restore. |
Test the restore before you need it. Restoring an image to a spare virtual machine takes an hour and tells you whether the backup is actually usable. Every constraint above is discovered either during a planned test or during a real outage.
For restoring one of these backup sets, see Windows System State and System Image Restore.
Troubleshooting
| Symptom | Cause and fix |
|---|---|
| Alert that the selected disk has insufficient space | The temporary storage location cannot hold the image. Choose a volume with free space of at least the used size of the volumes being backed up. |
| Warning that the storage location is a critical volume | You have pointed temporary storage at the system volume or another volume being backed up. Click No and move it elsewhere rather than letting the software work around it. |
| A network path is rejected as temporary storage | Use a UNC path rather than a mapped drive letter, and check the client account has write access to the share. |
| Backup fails partway with a VSS or shadow copy error | Windows could not take a consistent snapshot. Check the VSS writers on the machine, confirm there is free space on every volume being imaged, and confirm no other backup product is holding the writers. |
| Backups fail with insufficient disk space despite a large temporary volume | The temporary directory in Others is a separate setting from the system image storage location, and is often still on drive C. See the final step above. |
| The image restores but the machine will not boot | Usually a firmware or driver mismatch. Check UEFI against BIOS, and whether the target needs storage controller drivers. |
If you need a hand with any of the above, contact us at support@bobcloud.net.