This guide covers restoring a Windows System or System State backup: recovering the system image files with the backup software, then recovering the server or workstation itself using either the Windows Server Backup Recovery Wizard or the Windows Recovery Environment.
Note: the screenshots in this guide are taken from an MS Windows System backup set, with MS Windows System State screens shown where they differ.
On this page
- Restore the system image — recover the image files with the backup software
- Recovering your server — which tool recovers what, and the wbadmin commands
- Windows System / System State recovery — using the Windows Server Backup Recovery Wizard
- Recovering the operating system or full system — using the Windows Recovery Environment
Restore the system image
-
Log in to the backup software.
-
Click the Restore icon on the main interface.
-
Select the backup set and destination.
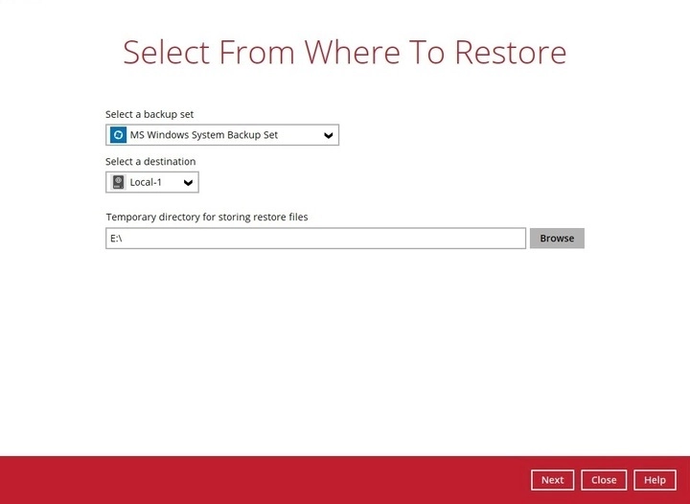
You can choose the temporary directory to use by clicking Browse.

-
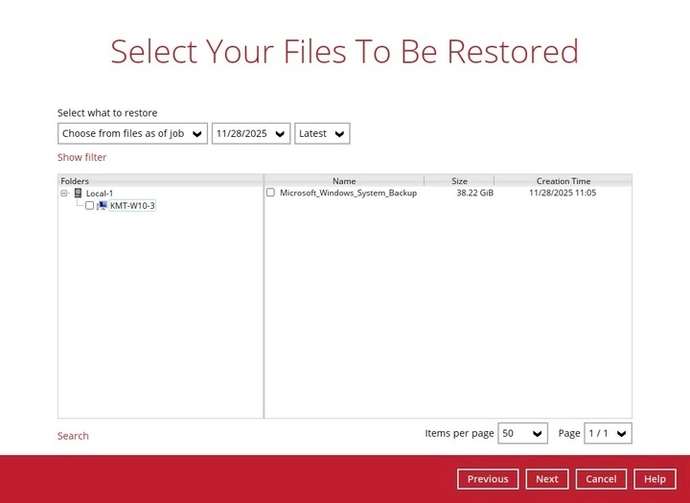
Choose a specific backup job, or the latest job available, from the Select what to restore drop-down. Once done with the selection, click Next.
-
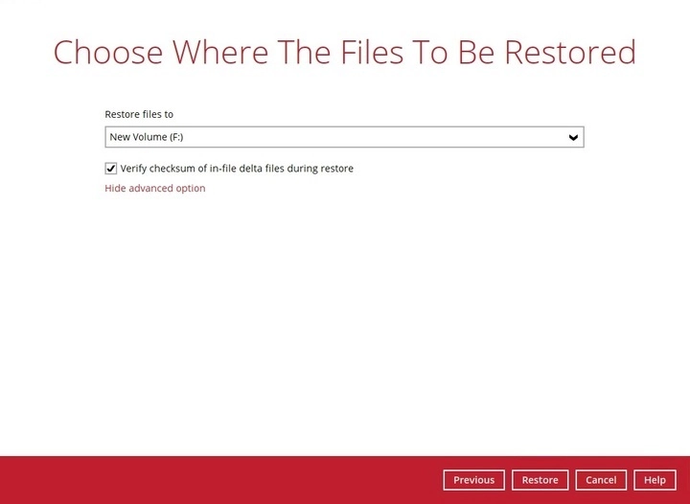
Select whether to restore the system image to a local volume or to a removable drive.
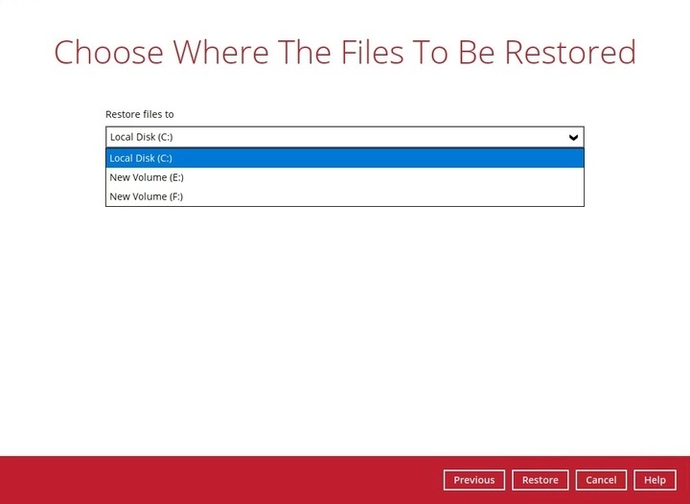
Click Show advanced option to configure other restore settings.
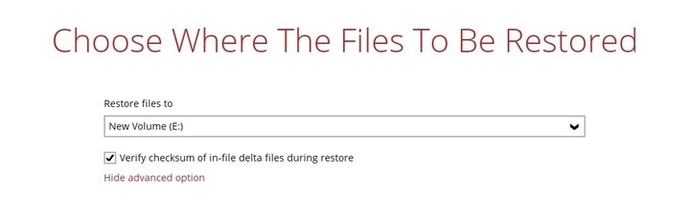
Verify checksum of in-file delta files during restore — enabling this verifies the checksum of in-file delta files during the restore, checking the data for errors and creating a data summary of the in-file delta files that is included in the report.
-
Click Restore to start the restoration.
-
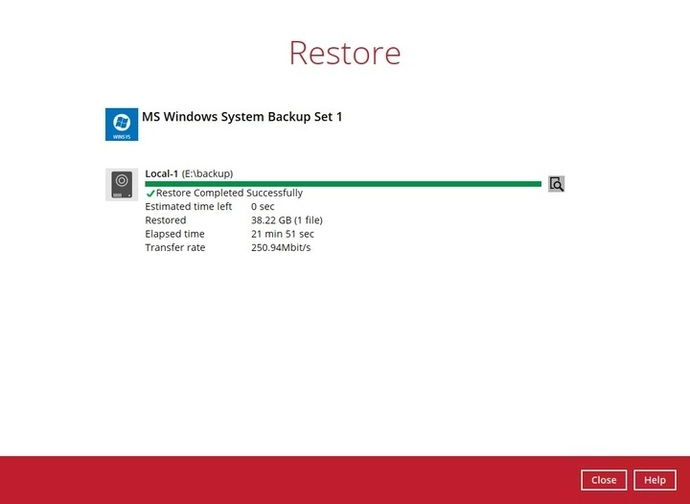
This screen is displayed when the system image files have been restored successfully.
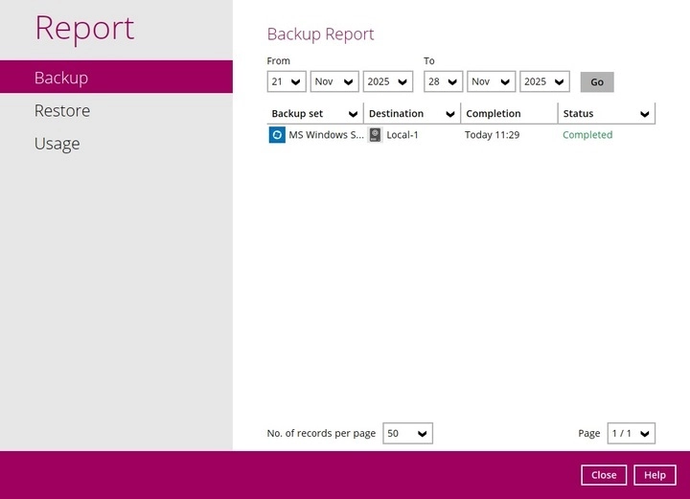
To view the report, go to Report > Restore.

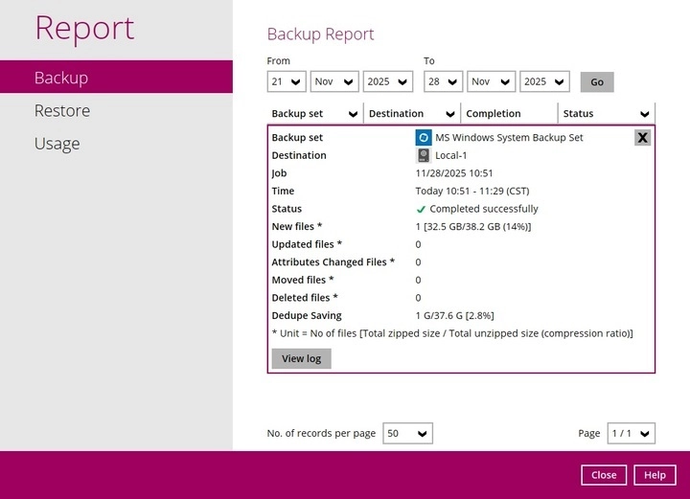
The Restore Report screen shows the backup set with its destination, completion date and time, and status.
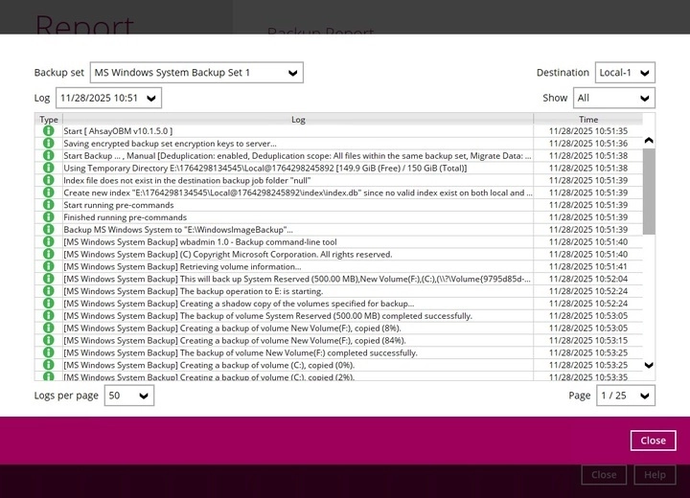
Click the restore report to see a summary of the restoration. You can also click View log for the log summary of your backup.
-
The restored system image files are stored in the WindowsImageBackup folder in the restore location.
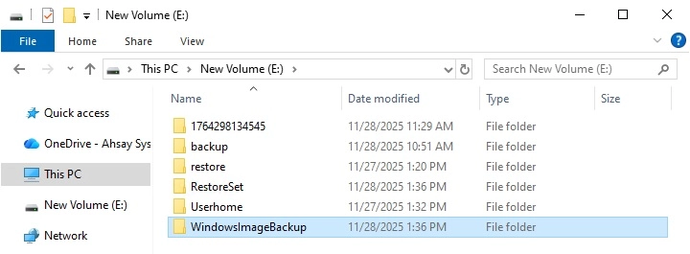
Important: as well as the system image files, the WindowsImageBackup folder holds catalog files containing information about all backups done up to the current one, and MediaId, which identifies the backup storage location. This information is required to perform a recovery — do not alter the directory structure or delete any file or folder within the WindowsImageBackup folder.
-
Copy the WindowsImageBackup folder and its contents to the server you want to restore, or to a network drive that server can reach.
The folder must sit at the root level of a volume (the top-most level), unless you are copying it to a network drive.
-
Continue to the section below that matches the type of recovery you want to perform — either the Windows Server Backup user interface, or the Windows Recovery Environment for a full system recovery.
Recovering your server
On server platforms such as Server 2016 / 2019 / 2022 / 2025 you can recover individual files, folders, volumes, applications, application data, the operating system, or the full system (bare metal) with these tools:
- Recovery wizard (in Windows Server Backup) — files, folders, volumes, applications and application data.
- Windows setup disc / Windows Recovery Environment (Windows RE) — operating system (critical volume) and full server recovery (all volumes).
Note: you can also perform these tasks with the
wbadmincommand. Refer to Microsoft's Wbadmin documentation for the syntax.
To determine what can be recovered from your restored system image, run the following in an elevated command prompt:
wbadmin get versions
[-backupTarget:{<BackupTargetLocation> | <NetworkSharePath>}]
Example, with the system image restored to the D: volume:
C:\Users\Administrator>wbadmin get versions -backupTarget:d:
wbadmin 1.0 - Backup command-line tool
(C) Copyright Microsoft Corporation. All rights reserved.

Backup time: 17/1/2023 11:02 AM
Backup target: 1394/USB Disk labeled New Volume (D:)
Version identifier: 1/17/2023-03:02
Can recover: Volume(s), File(s), Application(s), Bare Metal Recovery, System State
Snapshot ID: {593d7d81-f934-4baa-8e80-866680eb04e9}
On non-server platforms such as Windows 10 and 11 you can recover the full system (bare metal) using the advanced startup options, either in safe mode or from Windows installation media.
Windows System / System State recovery using the Windows Server Backup interface
To recover the Windows System backup using the Recovery Wizard in the Windows Server Backup user interface:
-
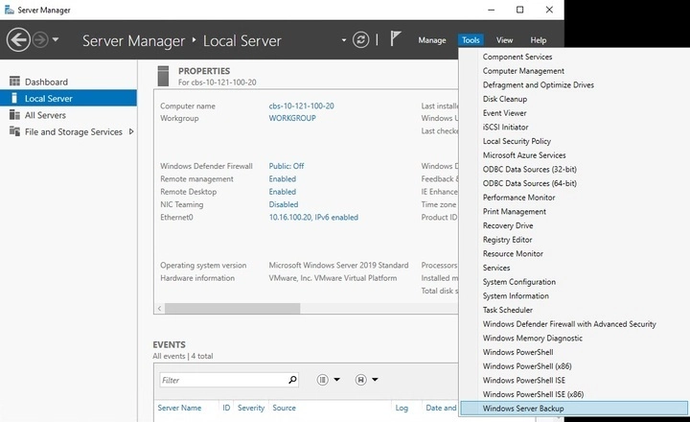
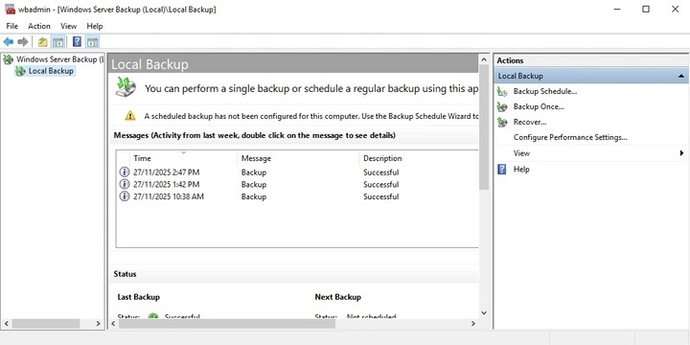
Open Server Manager, click Tools and select Windows Server Backup.
-
In the Actions panel on the right, click Recover.
-
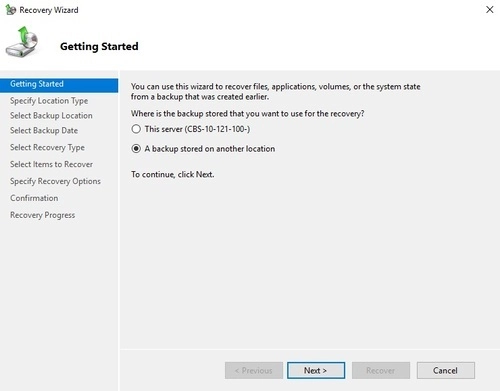
On the Getting Started page, select A backup stored on another location, then click Next.
-
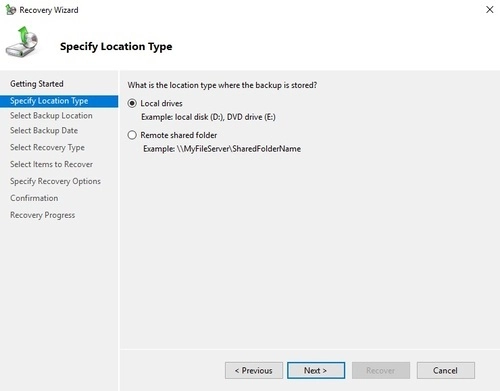
On the Specify Location Type page, select Local drives if the system image was copied to a local volume on the server, or Remote shared folder if it was copied to a network path the server can reach.
-
The next screen depends on the location type you selected.
If Local drives was selected, on the Select Backup Location page choose the volume holding the system image file.
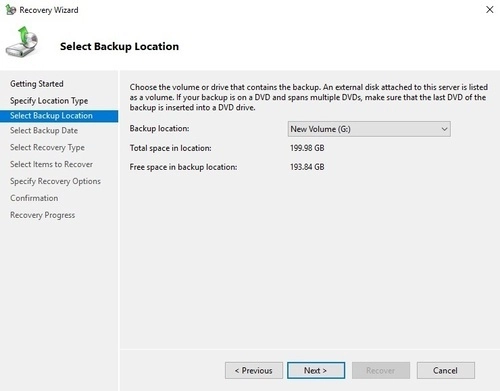
Note: this assumes the WindowsImageBackup folder was copied to G:\WindowsImageBackup.
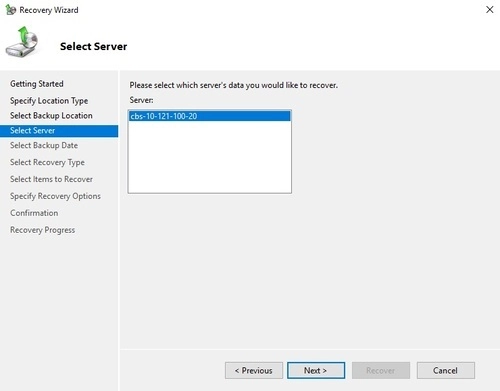
On the Select Server page, select the server whose data you want to recover.
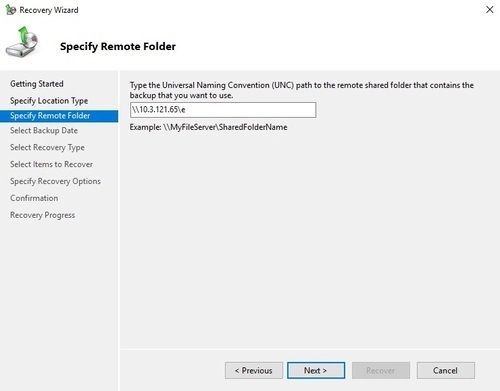
If Remote shared folder was selected, on the Specify Remote Folder page enter the path to the remote shared folder.
-
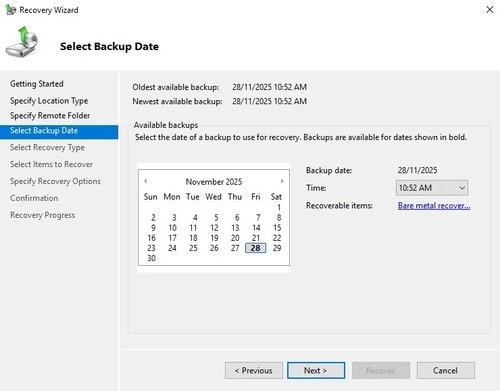
On the Select Backup Date page, select the point in time you want to restore from.
-
On the Select Recovery Type page, choose what to recover: files and folders, volumes, applications or system state. Each is covered below.
Files and folders
Select Files and folders, then click Next.
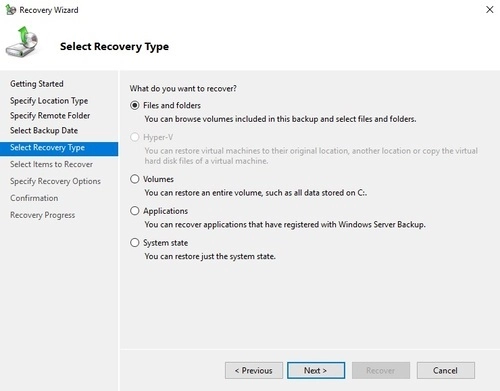
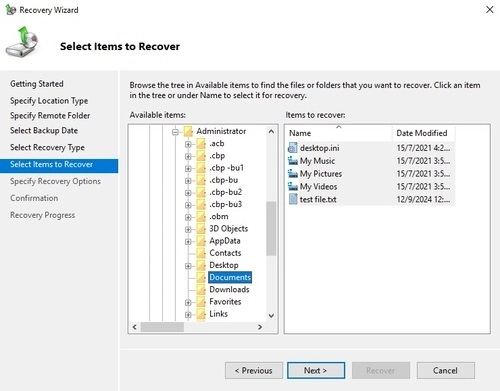
On the Select Items to Recover page, under Available items, expand the list until the folder you want is visible. Click a folder to show its contents in the adjacent pane, then click each item you want to restore.
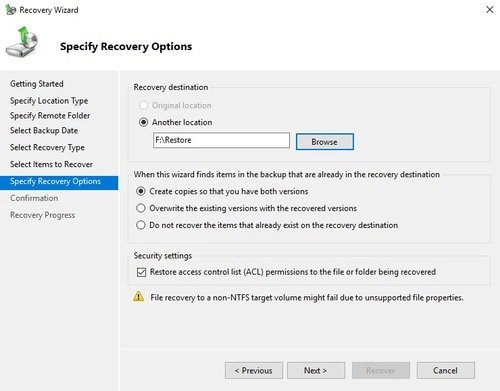
On the Specify Recovery Options page, under Recovery destination, select Another location. Type the path or click Browse to select it. Adjust the setting for what happens when the wizard finds items already in the recovery destination, and the security settings, if necessary. Then click Next.
Volumes
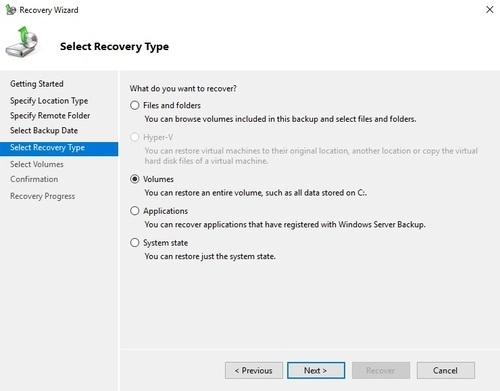
Select Volumes, then click Next.
On the Select Volumes page, tick the volumes you want to recover in the Source Volume column. Then, from the drop-down in the Destination Volume column, select where you want to recover the volume to, and click Next.
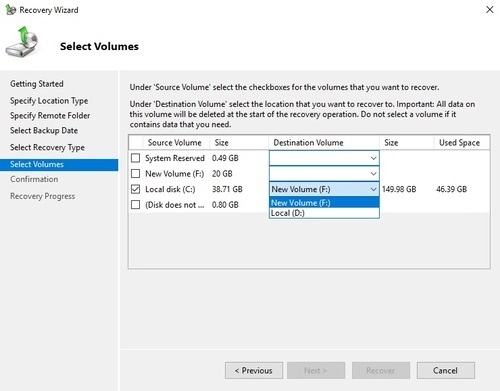
Important: before clicking Next, make sure the destination volume is empty, or does not contain information you will need later.
Applications
Select Applications, then click Next.
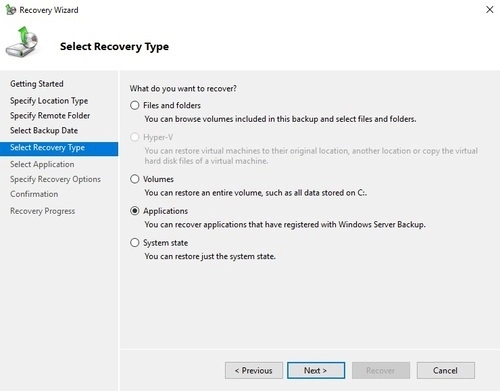
On the Select Application page, click the application you want to recover, then click Next.
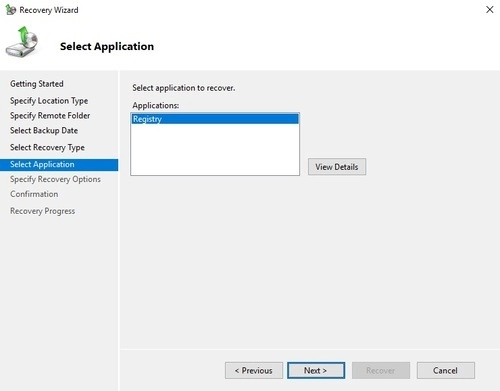
Note: if the backup you are using is the most recent and the application supports a roll-forward of its database, you will see a check box labelled “Do not perform a roll-forward recovery of the application databases”. Tick it if you want to stop Windows Server Backup rolling forward the application database currently on your server.
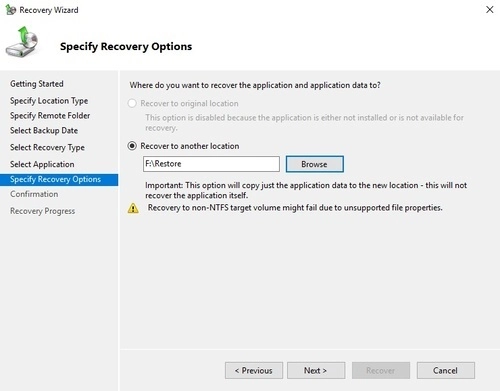
On the Specify Recovery Options page, select Recover to another location. Type the path or click Browse to select it, then click Next.
System state
Select System state, then click Next.
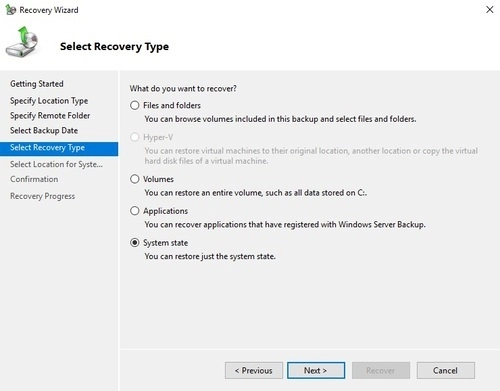
On the Select Location for System State Recovery page, select Original location to restore the system state to the same physical computer it was backed up from, or Alternate location to restore a copy of the system state as a set of files.
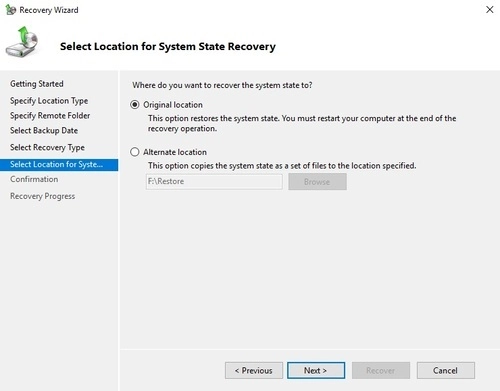
Note: the options shown differ for a system state containing Active Directory Domain Services. You also need to start the server in Directory Services Restore Mode (DSRM) to restore system state data containing AD DS.
-
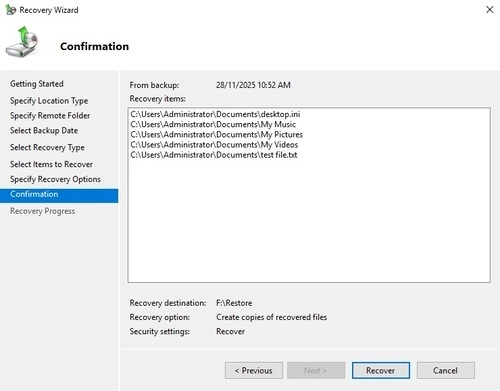
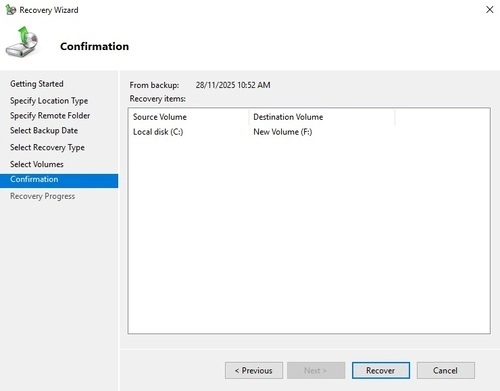
On the Confirmation page, review the details and click Recover to restore the specified items.
Files and folders:
Volumes:
Applications:
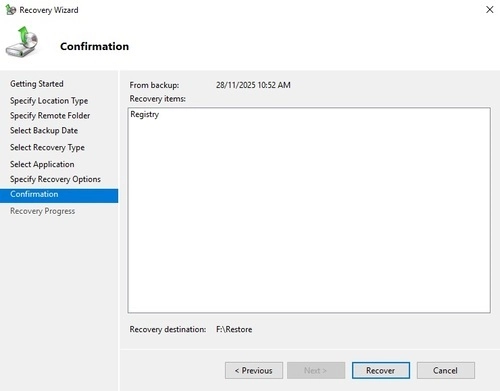
System state:
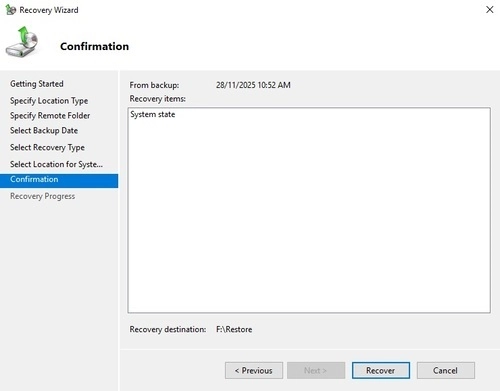
-
On the Recovery Progress page, the status and result of the recovery are displayed. Click Close to end the process.
Files and folders:
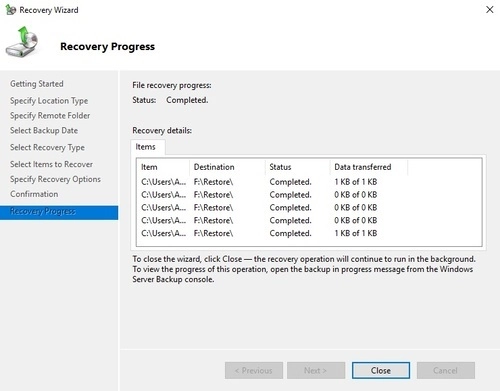
Volumes:
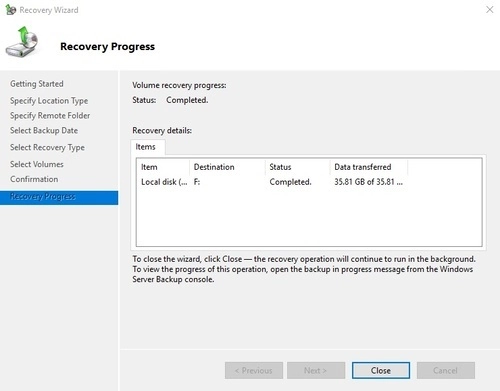
Applications:
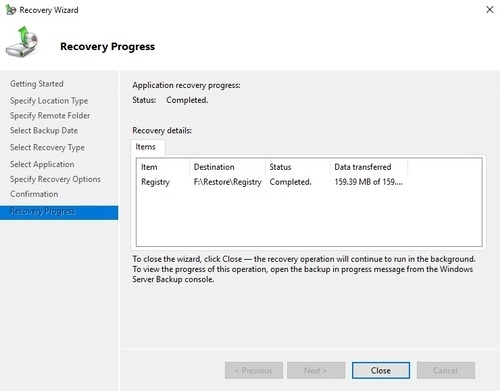
System state:
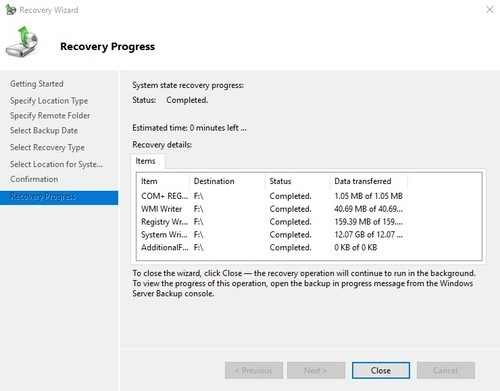
Important: when restoring to the original location, a system state recovery cannot be stopped once started — interrupting it can leave the system unbootable.
Recovering the operating system or full system
You can recover an operating system or full system using the Windows Recovery Environment, or by booting from a Windows setup disc. Insert a setup disc matching the architecture of the system you are recovering, then start or restart the computer and press the required key to boot from the disc.
-
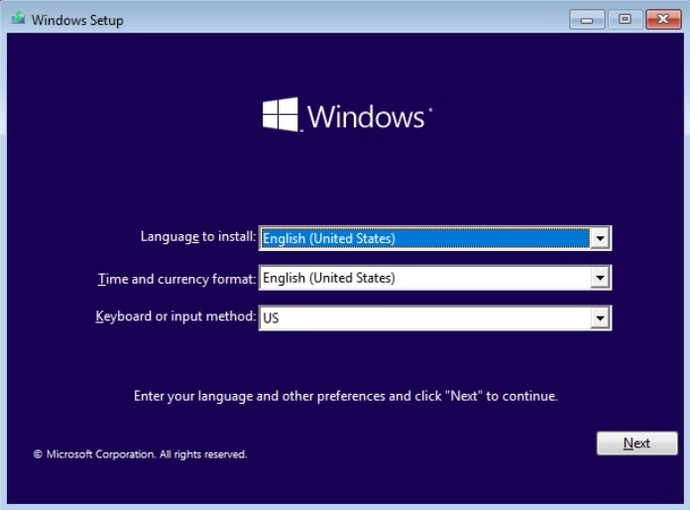
Set the language, time and currency, and keyboard or input method, then click Next.
-
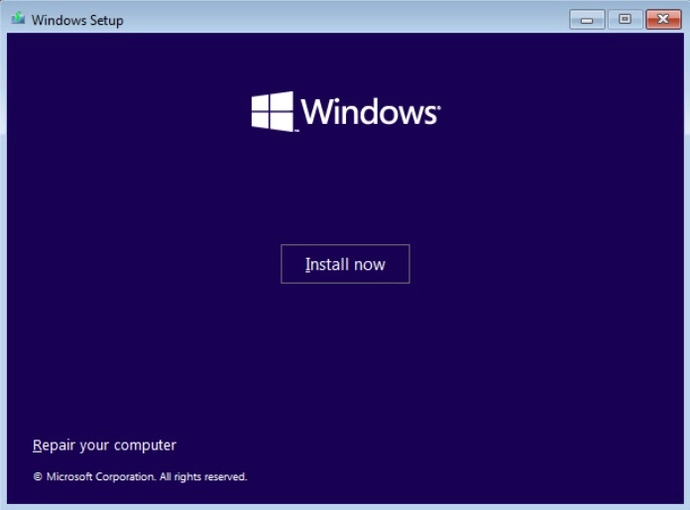
On the Windows Setup page, click Repair your computer.
-
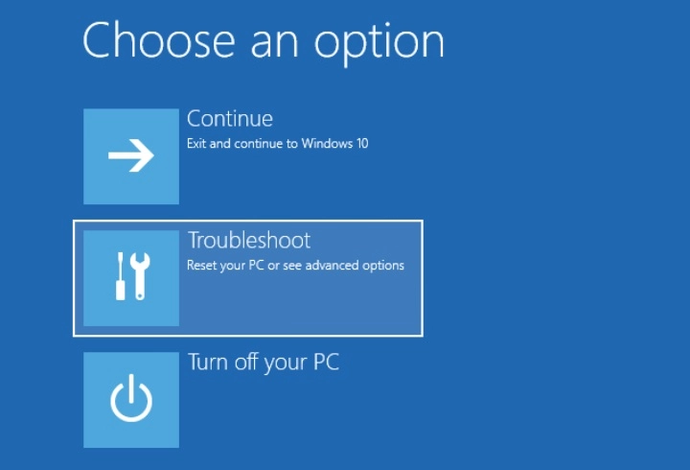
On the Choose an option page, click Troubleshoot.
-
Click Advanced options.
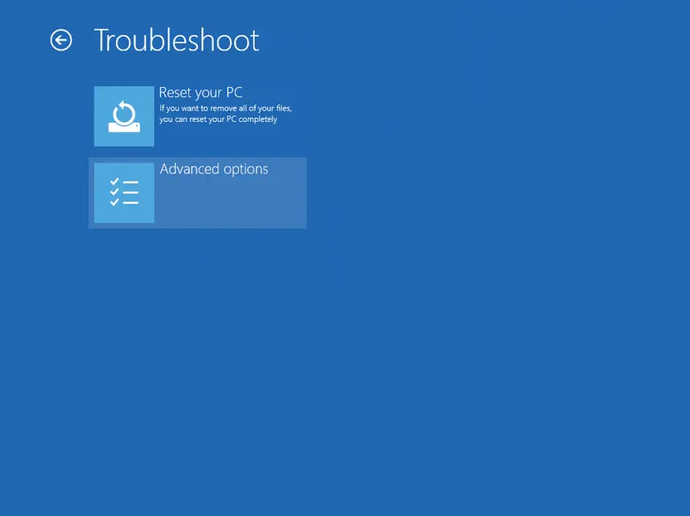
Note: this screen is only shown on server platforms.
-
Click System Image Recovery.
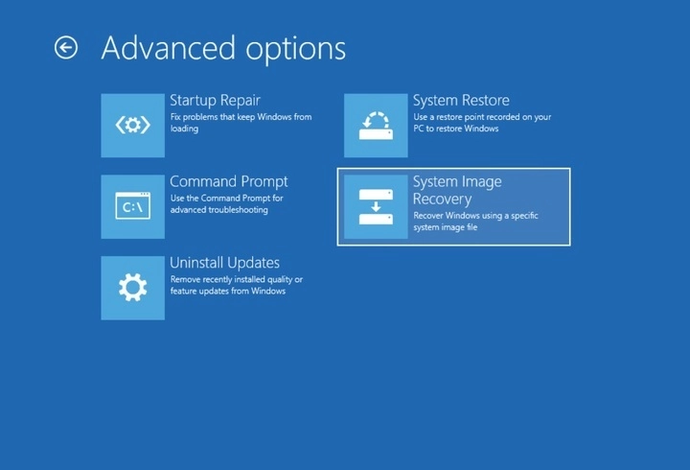
-
Confirm the target operating system. This opens the Re-image your computer page.
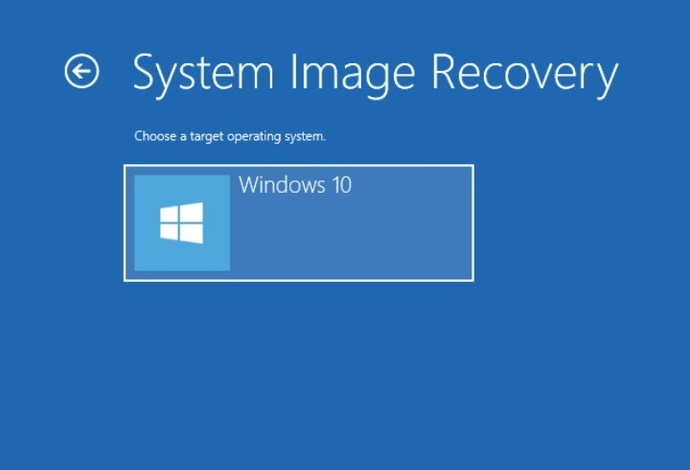
-
Log in with an administrative account by clicking Administrator.
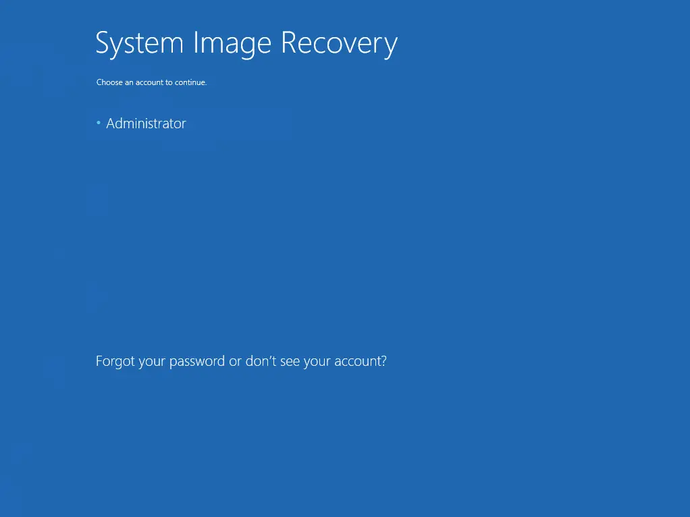
Note: this screen is only shown on non-server platforms.
-
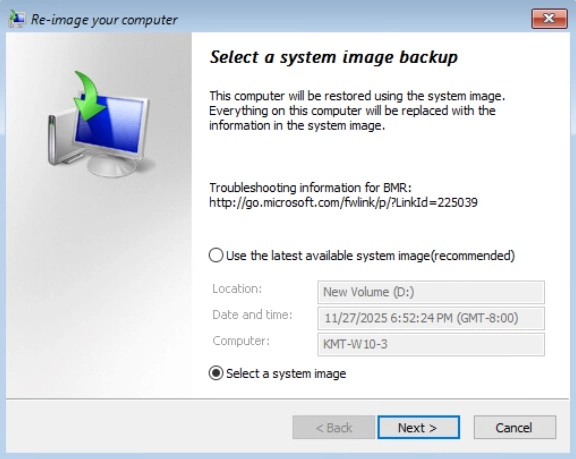
Choose Select a system image, then click Next.
-
Select the location holding the system image to restore from.
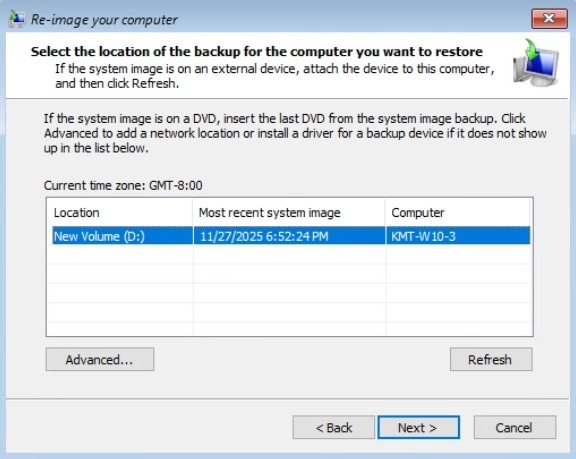
If you do not see the image listed:
- Click Advanced and install the required driver for the removable drive, if the system image was copied to a removable drive attached to the server. The driver must be on the local system — you cannot install one from the network.
- Click Advanced and browse to the remote shared folder holding the system image, if it was copied to a network path.
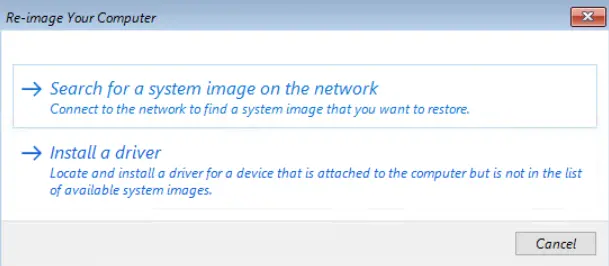
In a domain environment, if the backup storage location is on a computer that is a member of that domain, the computer holding the storage location must be on the IPsec boundary to be reachable by a non-domain computer. When a computer boots into the Windows Recovery Environment it becomes a non-domain computer and cannot reach the usual network shares — only computers that allow non-domain access to the share can be used as a backup storage location this way.
-
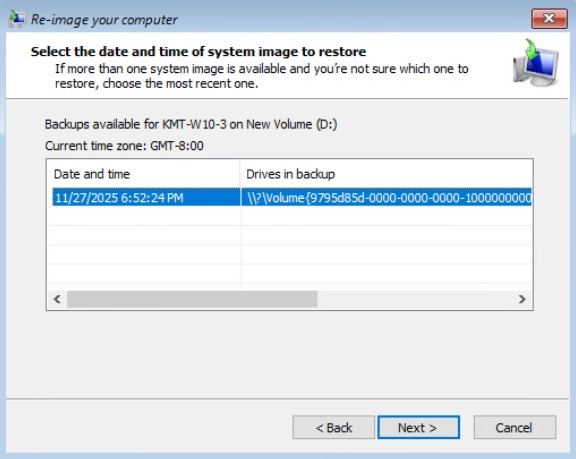
Select the date and time of the system image to restore.
-
On the Choose additional restore options page, tick Format and repartition disks to delete existing partitions and reformat the destination disks to match the backup.
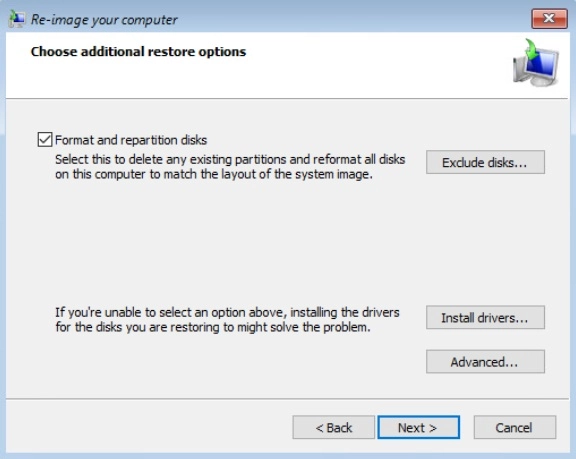
Click Exclude disks, then tick any disks you want to keep out of the formatting and partitioning.
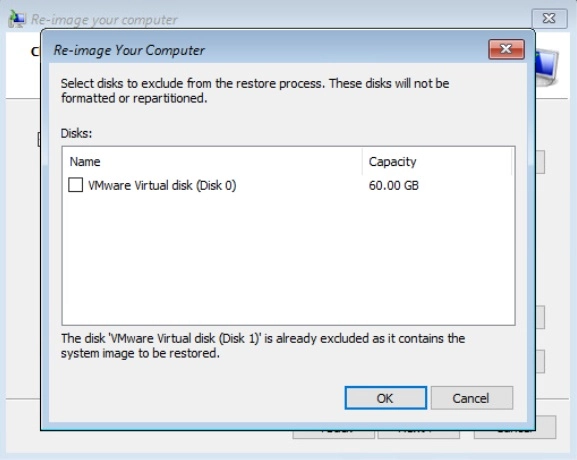
Note: the disk holding the backup you are restoring from is excluded automatically.
Tick Only restore system drives to perform an operating-system-only recovery instead of a full system recovery.
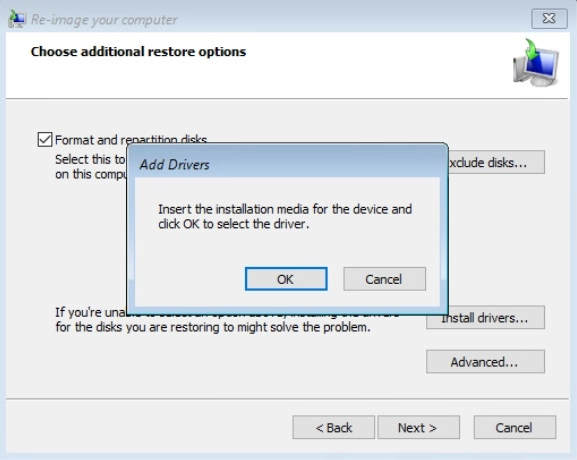
Click Install drivers to install device drivers for the hardware you are recovering to.
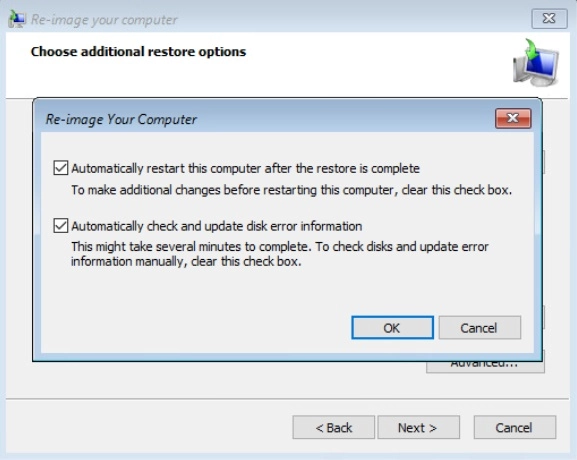
Click Advanced to set whether the computer restarts automatically and whether disks are checked for errors immediately after the recovery, then click Next.
-
Confirm the details for the restoration, then click Finish to start the recovery.
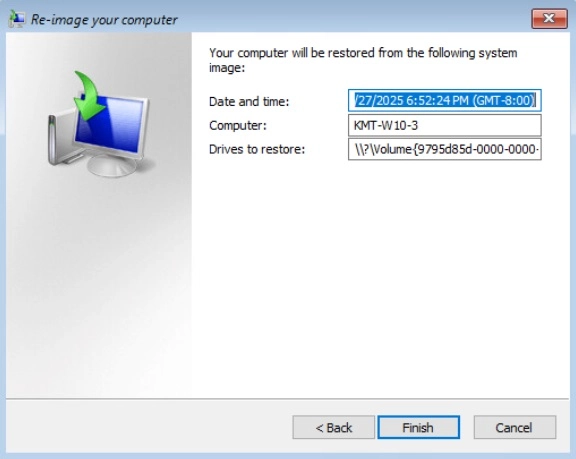
Important: do not interrupt the restore process.
The recovery succeeds as long as all critical volumes — those holding operating system components — are recovered. If a data volume cannot be recovered, Windows shows a prompt listing the unrecoverable volumes at the end of the operation.
If you need a hand with any of the above, contact us at support@bobcloud.net.