This guide covers creating a Hyper-V backup set in the backup software, for both cluster and non-cluster environments, along with the limitations that decide whether Hyper-V guest backup is the right approach at all.
Contents
Read the limitations first. Several common Hyper-V configurations — pass-through disks, VMs on SMB 3.0 shares, and VMs with replication enabled — cannot be backed up at guest level at all. Checking the appendix before you build the set will save you discovering it on the first backup run.
Cluster and non-cluster environments
There are two kinds of Hyper-V backup set, cluster and non-cluster. Which one you create is determined by the Version you select in step 3, so decide before you start. The screenshots throughout this guide are from a non-cluster set.
Non-cluster — a single Hyper-V host. The backup software runs on the host and backs up its guest VMs to your chosen destinations.
Cluster — two or more Hyper-V nodes sharing a Cluster Shared Volume. The software is installed on every node and the same backup set is configured on each, so that whichever node owns a VM at the time can back it up. There are two configurations: Active/Passive, where at least one node sits idle running no VMs or resources, and Active/Active, where all nodes are running VMs. Both are set up the same way.
Creating the backup set
-
Click Backup Sets on the main interface of the backup software.
-
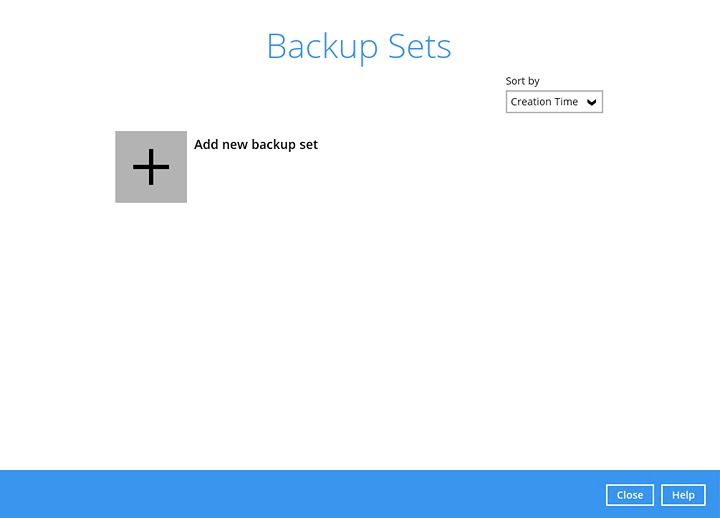
Create a backup set by clicking the + icon beside “Add new backup set”.
-
Enter a Name, then select MS Hyper-V Backup as the backup set type and choose the Version. Click Next to proceed.
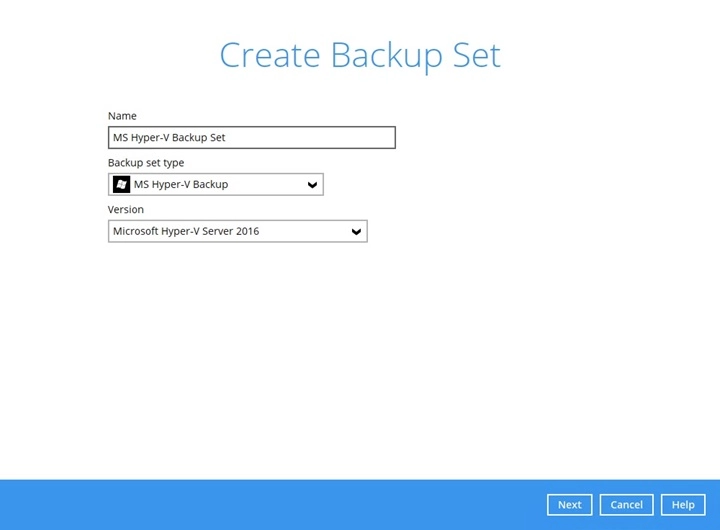
The Version is what determines whether this is a cluster or non-cluster backup set. Select the version marked (Failover Cluster) for a cluster environment, or the regular version for a single host.
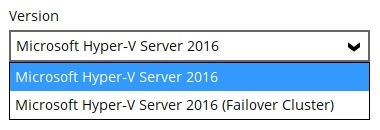
Note: the software detects the Hyper-V version installed on the host automatically, so the list reflects what is actually there. If the version you expect is missing, check that the Hyper-V role is installed and running on the machine where the software is installed.
-
In the Backup Source window, select the guest VMs you want to back up. Click Next to proceed.
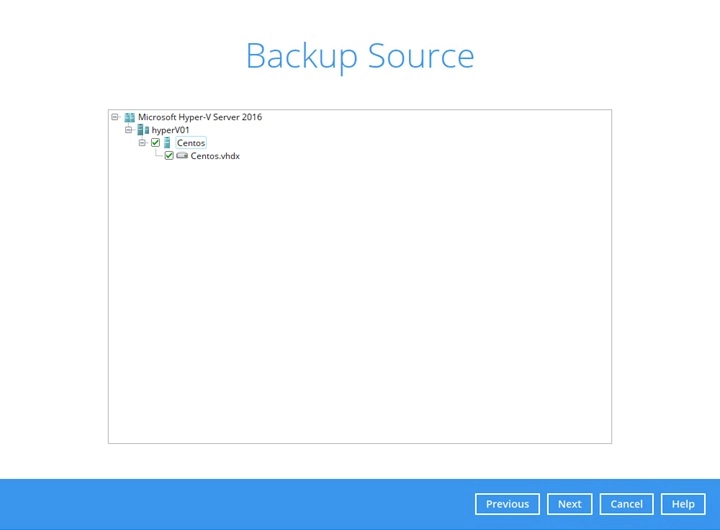
You can select whole VMs or individual virtual disks. Selecting whole VMs is strongly preferred — restoring from an individual virtual disk backup carries significant restrictions, described in the appendix.
-
In the Schedule window, edit the existing schedule or click Add to create one so backup jobs run automatically.
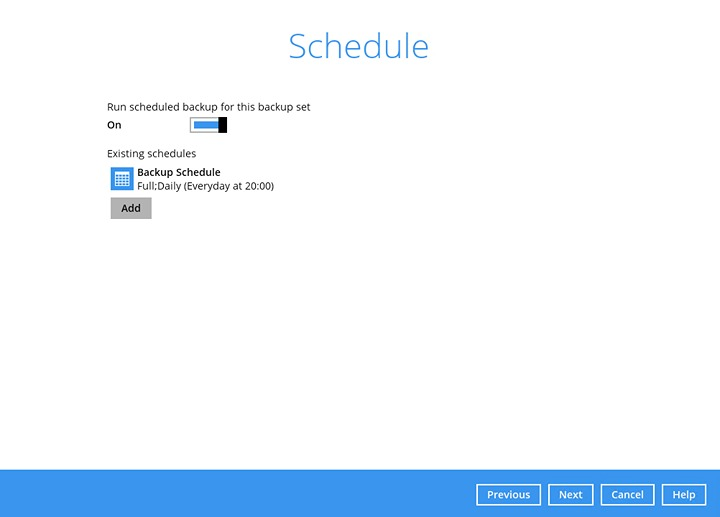
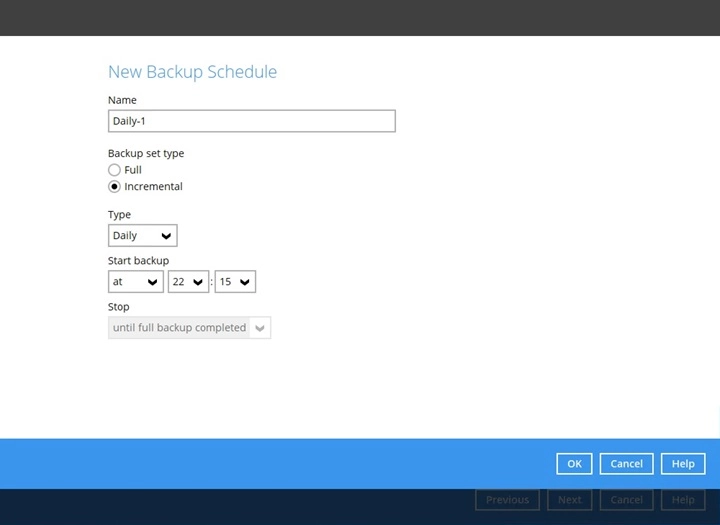
Click OK when you are done with the settings, then Next to proceed.
-
In the Destination window, click the + icon to add a storage destination, then select the Destination storage.
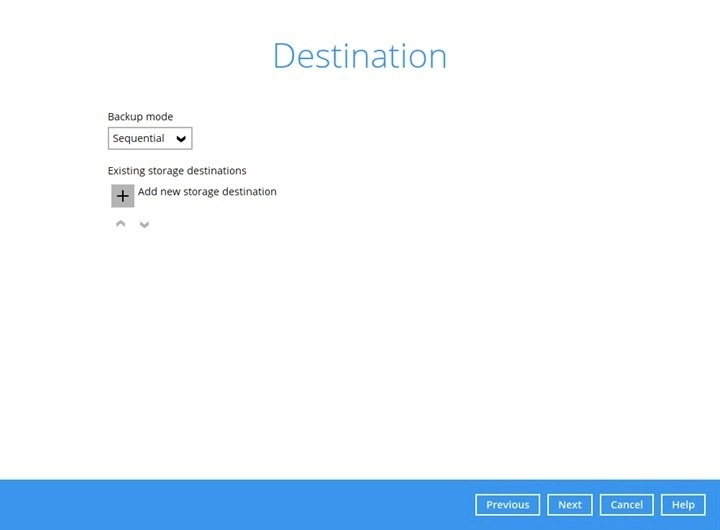
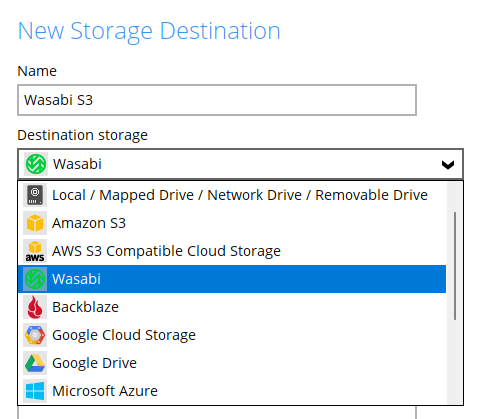
Complete the settings for the destination you chose, click Test to validate it, then click OK.
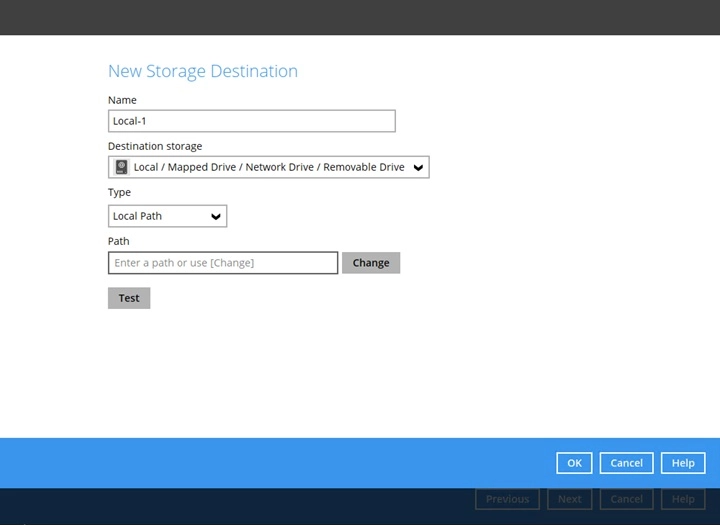
You can add multiple storage destinations. Backup data is uploaded to all of them, in the order you added them. Click Next to proceed.
-
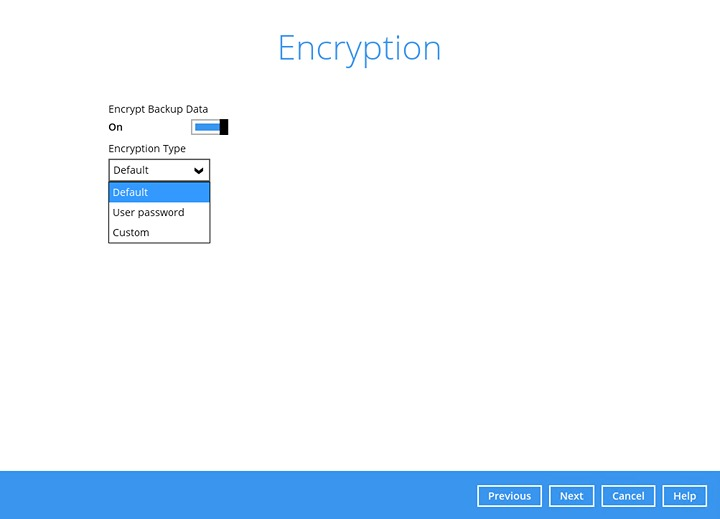
In the Encryption window, Encrypt Backup Data is enabled by default with an encryption key preset by the system, which provides the most secure protection. Click Next when you are done.
-
If you enabled the encryption key feature in the previous step, the following pop-up window is shown, whichever encryption type you selected.

- Unmask encryption key — the key is masked by default; click to show it.
- Copy to clipboard — copies the encryption key so you can paste it somewhere of your choice.
- Confirm — exits the pop-up and proceeds to the next step.

Important: write the encryption key down and keep it somewhere safe. Without it your backup data cannot be restored, and we cannot recover it for you.
-
Enter the Windows login credentials the software will use to authenticate the scheduled backup job.
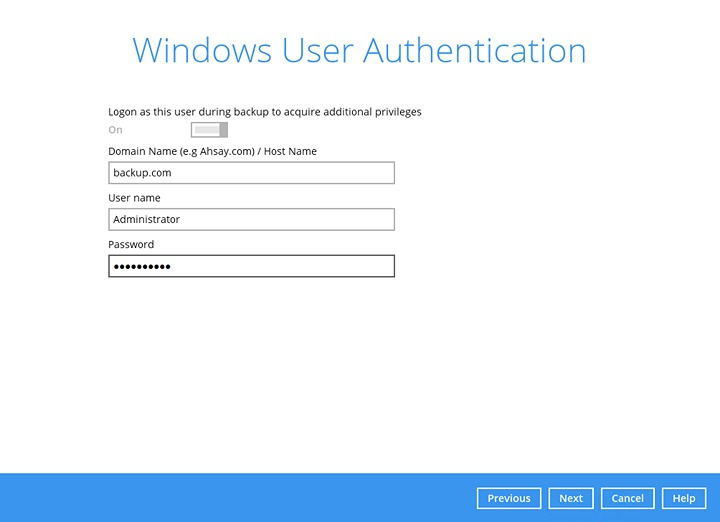
Note: if the backup schedule is turned off for this backup set, this screen is skipped. The credentials can be added or updated after the backup set has been created.
-
Select the temporary directory for storing temporary files, then click Next to finish the setting.
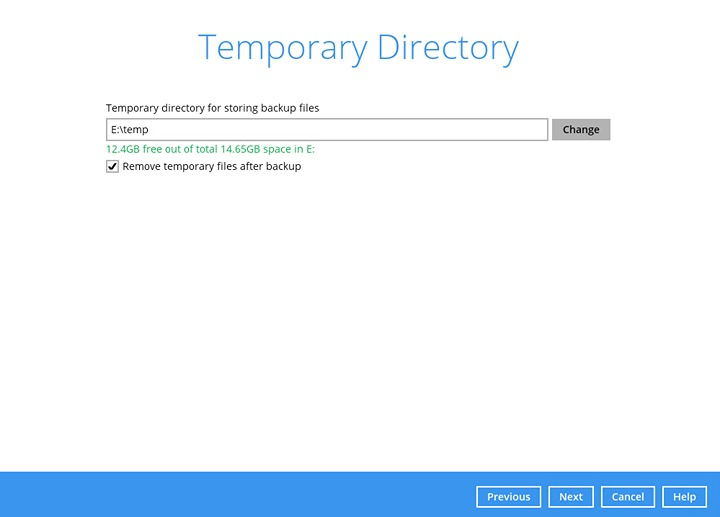
By default this is set to
C:\Users\Administrator\.obm\temp. We strongly recommend changing it to another available drive — drive E: for example — and not the Windows system drive.In a cluster, do not point the temporary directory at the ClusterStorage disk. It will appear to work for backups, but granular restore fails with an error that cannot be worked around without changing this setting. Use a local directory on the node.
-
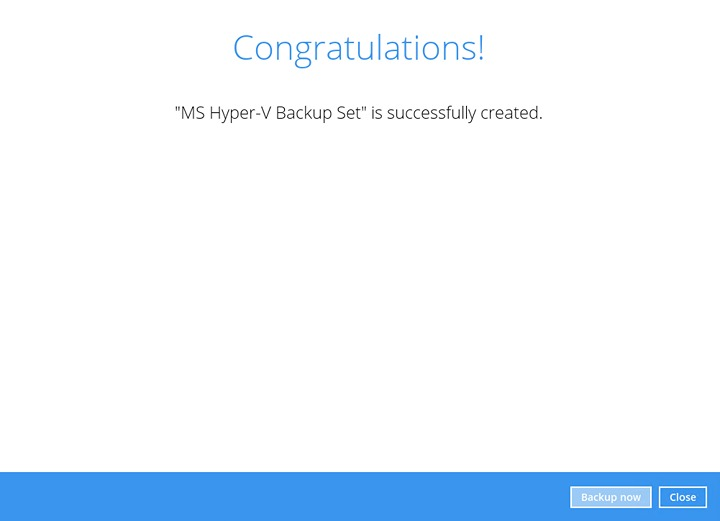
This screen is displayed when the new backup set is created successfully.
-
Optional: select your preferred compression type. Go to Others > Compressions, then choose from No Compression, Normal, Fast (compressed size larger than normal) or Fast with optimisation for local.
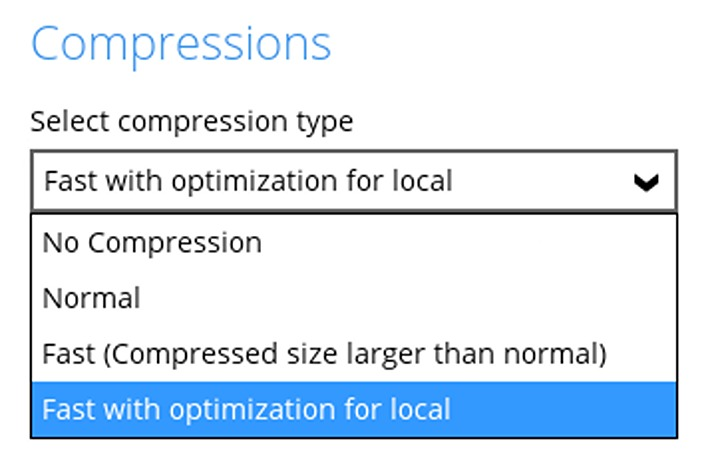
Click Save to apply the changes.
Setting up the remaining cluster nodes
Skip this section for a non-cluster backup set. For a cluster, the backup set must now be configured on every other node in the cluster, otherwise VMs will only be backed up while they happen to be owned by the node you set up first.
-
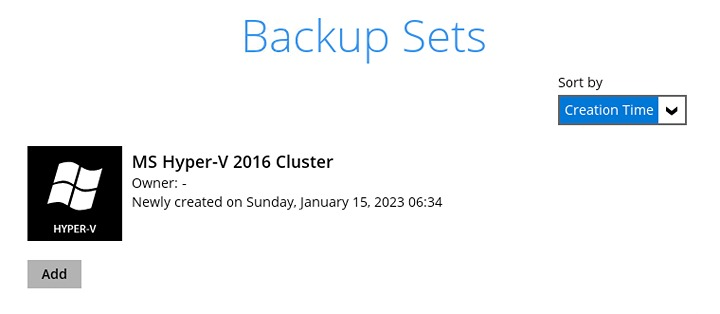
Click Close, then click on the Hyper-V backup set to complete the setup.
-
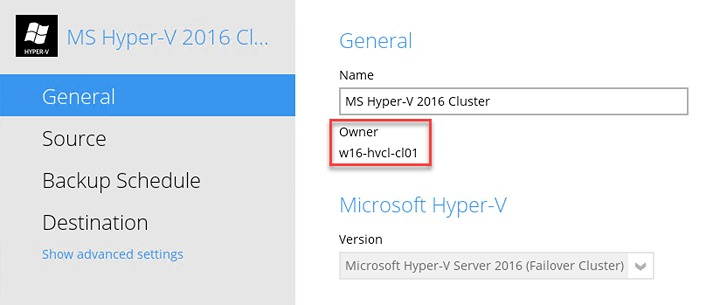
Go to General and verify that the node has been added — the Owner field shows which node currently owns the set.
-
On the next Hyper-V node, start the backup software and select the same Hyper-V backup set.
-
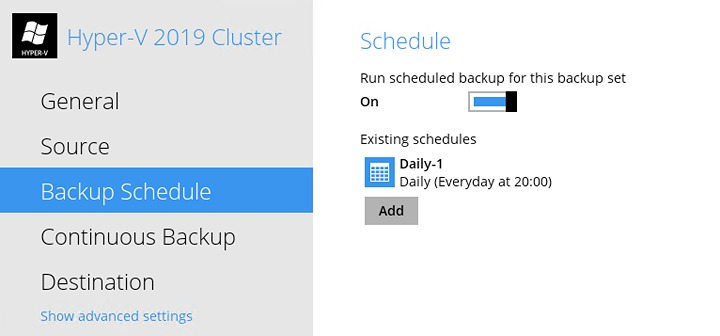
Go to Backup Schedule, enable Run scheduled backup for this backup set, set the schedule time, and click Save.
-
Go to General and verify the node has been added.
Repeat these steps for every node in the Hyper-V cluster.
Appendix: Hyper-V limitations
These are constraints of Hyper-V and the Microsoft VSS provider rather than of the backup software, so they apply however the backup is run. Check them before designing the backup set.
Backup limitations
| Limitation | Detail and workaround |
|---|---|
| VMs on SMB 3.0 shares | Not supported. Guest VMs whose files live on an SMB 3.0 share cannot be backed up at host level. |
| Pass-through disks | Not supported. Where a physical disk is attached directly to a guest VM, the Microsoft Software Shadow Copy Provider cannot supply the VSS snapshot that a guest VM backup requires. Workaround: install the backup software inside the guest VM and back it up as an ordinary machine instead. |
| Replication enabled | Replication must be disabled on any VM selected for backup. If it is left on, the backup job fails when it tries to take the VM snapshot — see Troubleshooting for the exact error. |
Restore limitations
| Limitation | Detail |
|---|---|
| Hyper-V version must match | A guest VM can only be restored to a Hyper-V server running the same version. A VM backed up from Hyper-V 2012 R2 cannot be restored to Hyper-V 2008 R2, or the other way round. |
| The OS disk must be included | The VM will not start if the virtual disk containing the guest operating system was not restored. When backing up selectively, make sure the system disk is always in the selection. |
| Individual virtual disks | Restore of an individual virtual disk is only supported through the Restore raw file option, and only for a disk with no snapshots. It also requires editing the Hyper-V guest configuration files by hand — only attempt this with a solid understanding of Hyper-V, or the guest VM may not start properly. |
| Snapshot reversion | Where individual virtual disks were backed up, the restored VM cannot revert to a previous snapshot if that snapshot contains disks which were not themselves backed up. |
| Run Direct | Run Direct restore is not supported for a VM containing VHDS shared virtual disks. |
Taken together, these are a strong argument for backing up whole VMs rather than selected virtual disks. Most of the restrictions above only apply to individual-disk backups.
Granular restore limitations
Granular restore mounts a virtual disk so individual files and folders can be retrieved without restoring the whole VM. It has its own constraints:
- Encrypted disks cannot be mounted — a virtual disk protected by BitLocker or a third-party encryption product is not accessible to granular restore.
- Encrypted files cannot be restored — individual files or folders using “Encrypt contents to secure data” in Advanced attributes are excluded.
- Linux and Unix file systems cannot be mounted — a limitation of the file system drivers. Granular restore is effectively Windows-guest only.
- One VM at a time — and although any number of virtual disks can be mounted from that guest, files can only be retrieved from one virtual disk at a time.
- User Account Control must be disabled on the machine performing the restore.
- The temporary directory must not be on the ClusterStorage disk — if it is, granular restore fails outright and you will need to change the setting before you can proceed.
Troubleshooting
| Symptom | Cause and fix |
|---|---|
Failed to take VM snapshot. Error = [CreateVirtualSystemSnapshotV2] Error="The method call failed." (32775) | Replication is enabled on the VM being backed up. Disable replication for that VM and re-run the job. |
| A VM is missing from the Backup Source list | Usually a pass-through disk or an SMB 3.0 share — neither can be backed up at host level. Install the backup software inside the guest instead. |
| The Hyper-V version you expect is not in the Version list | The software reads the version from the host. Check that the Hyper-V role is installed and running on the machine where the software is installed. |
| Granular restore fails immediately on a cluster | The temporary directory is set to the ClusterStorage disk. Change it to a local directory on the node. |
| Granular restore cannot see files inside the disk | The disk or the files are encrypted, or the guest is Linux or Unix. Restore the whole VM or disk instead. |
| VMs stop being backed up after a failover | The backup set has not been configured on every cluster node. See Setting up the remaining cluster nodes. |
| A restored VM will not start | Either the disk holding the guest operating system was not included in the restore, or the target Hyper-V version differs from the source. |
| Backups fail with insufficient disk space | The temporary directory is still on drive C. See step 10. |
If you need a hand with any of the above, contact us at support@bobcloud.net.